
Alternating Crochet Credit Card Holder – Free Pattern
This crochet credit card holder not only features a nice texture, but also a nice color design. It is perfect for your credit cards or for giving gift cards to loved ones.

Use up your leftover cotton yarns from your stash to make this crochet gift card holder pattern in all sorts of color combinations.
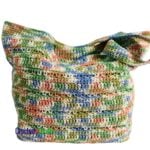
Not sure if the stitch pattern has a name, but I’m calling it the “Alternating” stitch because you alternate between the front and back loops of the stitches. Also, I’m alternating between the front and back loops. Other patterns in my “Alternating” series include a hat, bag, clutch, and phone pouch.
The finished size is just the right size to fit nicely over a single card, but will also stretch to hold a number of cards.
I used Bernat Handicrafter cotton, which is a medium worsted weight yarn. I like to use cotton for card holders because the cotton doesn’t stretch as much, making it more durable.
See More Gift Card Holders
- Credit or Gift Card Case
- Bead Stitch Crochet Gift Card Case
- Pretty Simple Credit Card Pouch
- Crochet Change Purse
You can also visit CPB for a few more FREE Card Holder Crochet Patterns.

Alternating Crochet Credit Card Holder
Skill Level
Materials
- Yarn: Bernat Handicrafter Cotton in 2 colors, or any #4 worsted cotton.
- Crochet Hook: 4.50mm
- Notions: 3/4" Button
- Other: Measuring Tape, Scissors, Yarn Needle.
Measurements
- Gauge: 2" over 9 sts.
- Finished Size: Fits a gift/credit card.
Abbreviations
- CA = Color A
- CB = Color B
- Blslst = Back Loop Slip Stitch
- Ch/Chs = Chain/Chains
- Flhdc = Front Loop Half Double Crochet
- FO = Fasten Off
- Hk = Hook
- Rep = Repeat
- Sc = Single Crochet
- Sl St = Slip Stitch
- St/Sts = Stitch/Stitches
- Crochet Abbreviations explained in more details.
Notes
- Use the tight slip stitch join to keep a straight seam, or whatever other method you may have.
- How to Join a Round using tight slip stitches.
- All rounds are joined in both loops of first stitch in round.
- Color changes are made after the joining slip stitch.
- Carry the yarn up at each round.
- If you experience difficulties making the first flhdc and blslst in each round, try wiggling the hook and keeping the stitches loose, but not too loose.
- The stitches are alternated with the half double crochet worked into the front loop only of the slip stitch, and the slip stitch is worked into the back loop only of the half double crochet.
- Alternating Between Front and Back Loops
Instructions
- With CA, Ch 15
- Rnd 1: Sc in 2nd ch from hk and in next 12 chs, 3 sc in last ch, working on opposite side of starting chs, sc in next 12 chs, 2 sc in last ch; join with sl st to first sc. (30 sts)
- Rnd 2: With CB, ch 1, flhdc in same st as join, blslst in next st, *flhdc in next st, blslst in next st; rep from * around; join with sl st in first flhdc. (30 sts)
- Rnd 3: With CA, blslst in same st as join, flhdc in next st, *blslst in next st, flhdc in next st; rep from * around; join with sl st in first blslst.
- Rnds 4-9: Rep rnds 2 & 3.
Begin Working in Rows
- Row 1: With CA, Ch 1, sc in first st and in next 14 sts. (15 sts) Turn, leaving remaining sts unworked.
- Rows 2-5: Rep row 1.
- Row 6: Ch 1, sc in first 7 sts, ch 3, skip next st, sc in last 7 sts. Do Not FO, Turn and continue with edging.
Edging
- With CA, Ch 1, sc in first st and into each st and ch across up to last st, work 3 sc into last st, continue to work along edge and sc evenly around, work another 2 sc into same st as where the first sc was made; join with sl st to first sc. FO.
- Attach the button to align with the button hole and you're all set.


I LOVE how that looks! It’s actually the best looking “houndstooth” that I’ve seen, and I’ve been searching for houndstooth! I had started a blanket in one houndstooth pattern, but I see it getting frogged and doing this instead, starting back over instead of turning each row. It’s PERFECT!
Thanks Amanda, I’m glad you like it. :)