How to Hem a Pair of Pants
I’m extremely short. For some reason I never grew past 4 foot 10 and a half. So every time I buy new jeans I HAVE to hem them. The only exception is when they are purchased in the girls section. But girls pants don’t fit right either. So ladies pants it is, and honestly, I don’t want to pay a seamstress every time I purchase a pair of new pants. And so I learned how to do it myself.
And in this tutorial, I’d like to show you step by step how I do it. I used a sewing machine, but if you don’t have one, you can always sew by hand. You just might need a bit more patience for that, but the end result will be just as durable if you take your time.
And best of all, it’s fast, fun and easy enough for anyone to do. When hemming your pants for the first time, it might take you a while, but once you have the hang of it, you can do a pair in as little as 20-30 minutes.
A quick and easy way to hem a pair of pants or jeans.
Things You will Need
1) Your NEW pair of pants or jeans
2) Your favorite pair of shoes
3) Measuring device, such as a ruler or measuring tape
4) Cutting mat, straight edge, rotary cutter, OR pair of scissors
5) Iron
6) Sewing machine – Or you can sew by hand
7) Ironing board or other surface suitable for ironing
8) Needle and thread compatible with your pant material
Getting Started
1) Wash and dry your jeans to shrink them down a bit
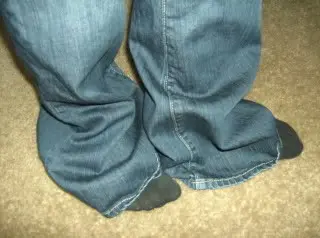
2) Put them on…

3) Now put on your favorite pair of shoes. This will help you determine the length of your pants if you’re planning on wearing high heels or platforms with these pants. As you can see, I’m wearing mine with platforms, so will need them a bit longer than if I was to wear them with regular shoes.
Measuring
4) Roll your pants up to the desired length and measure the excess length. Here we see it’s 4 inches too long. Do NOT cut yet.
5) Decide how wide your seam should be. In this case the seam is ½ inch so I will make mine the same. That means I will need about 1 inch of fabric to make my seam.
6) Subtract the 1 inch of fabric needed to make the seam from the 4 inches of excess length. This leaves you with only 3 inches of excess material that you will need to cut off.
Cutting
7) Line your pant leg up seam to seam, to allow for a more even cut.
8) Lay them on your cutting board evenly and using a straight-edge ruler, measure where to cut, and place on top. Press down firmly with one hand to keep the ruler in place and cut off the 3 inches of excess material using a rotary fabric cutter. (If you don’t have a cutting board and rotary fabric cutter, you may use scissors making sure to make an even cut across.)
Ironing – Preparing To Sew
9) Turn pants inside out
10) Fold over 1 inch of fabric to the wrong side of pants, and pin in place.
11) Iron. This will create a crease in the fabric, which will be the bottom of your seam.
12) Now you will make the fold that will hide the raw edge. Remove pins; fold in the fabric to the crease and replace the pins. Iron the edge being careful not to remove the crease created previously. This creates a fold just under ½ inch.
13) Now fold again at the first crease to hide the raw edges. Iron and pin to keep in place. You should have a fold of about 5/8 inch.
Sewing
14) Set your machine and make sure you are using the right needle and thread designed for the material of your pants. Set the tension using the scrap pieces which you cut off earlier. (If you don’t have a sewing machine, you can always sew by hand.)
15) Turn pants right-side out and sew.
16) Iron one more time from the wrong side to set in the new seam.
That’s all there’s to it! You just saved yourself the expense of a seamstress.
You might also enjoy the following:


