
Single Crochet Bag

This single crochet bag pattern is worked up in only single crochet stitches. It is perfect for absolute beginners to practice one of the easiest stitches in crochet. But don’t let the simplicity fool you, the crochet bag is perfect for everyone.
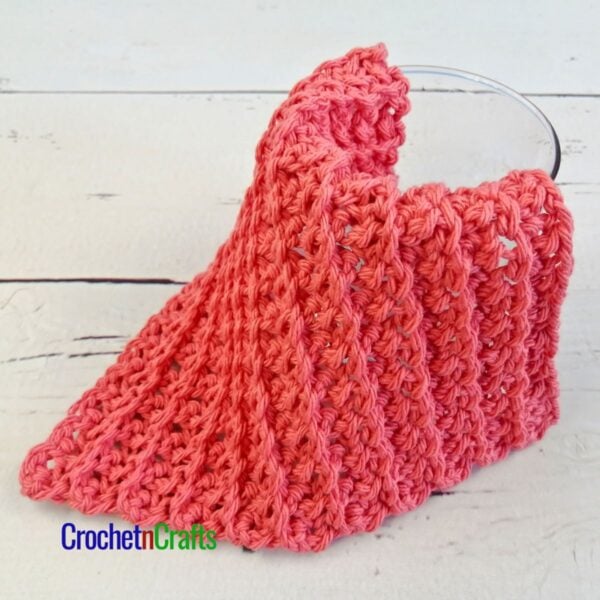
Although it’s a simple crochet bag pattern, the variegated yarn gives it a nice color design. The key is to maintain the same tension throughout to get consistent spirals across the bag.
Another thing I love about this bag is that it is solid and durable! At the same time, you might still want to line the inside with a sturdy fabric to make it last even longer. Here is the tutorial on how to line a bag.

About the Yarn
I used a worsted weight yarn in a variegated colorway and was super happy with the way the spirals turned out. I had to unravel a few times to keep the spirals somewhat consistent throughout. Depending on your tension, you may get a whole different design. That’s the beauty of working with variegated yarns, you get a different design each time!
If you are not keen on variegated yarns you can just as well use a solid color, or add a few stripes to make this your very own to suit your style.
The yarn is Bernat Handicrafter Cotton, a #4 worsted-weight cotton yarn. It’s nice and sturdy, especially when worked with the single crochet stitch.
Lily Sugar ‘n’ Cream is another great yarn that you could use for this bag.


About the Size
The size is given in one size, but it can easily be adjusted as there is no stitch count.
To adjust the size, simply do more or less rounds of the increase rounds to get the rectangle to the size that you want the bottom of the bag to be. Then continue in an even pattern until you get to the height that you want.
Then for the handles, you can refer to this tutorial on how to make bag handles for any sized bag. It’s a quick and easy formula that allows you to customize the handles as you like.
How It’s Made
The easy crochet bag pattern is worked in one piece from the bottom up, making it great for beginners. Even the handles are worked in one piece with the bag.
As already mentioned, the only stitches needed are the single crochet stitches. So if you can make that, can join a round and are ready to work on the opposite side of a starting chain then you are ready to crochet this bag.
Single Crochet Patterns
See More Single Crochet Patterns.


Purchase Your Printable PDF

Single Crochet Bag
Skill Level
Materials
- Yarn: Bernat Handicrafter Cotton (Worsted Weight, #4; 100% Cotton; 340g/12oz; 556m/608yds) Color: Sunkissed Ombre , 1 ball
- Crochet Hook: H 5.00mm
- Other: Measuring Tape, Scissors, Yarn Needle.
Measurements
- Gauge: 14 sts = 4".
- Finished Size (Laid Flat): 13.5" wide by 12" high not counting the handles.
Abbreviations
- Ch/Chs = Chain/Chains
- Rep = Repeat
- Sc = Single Crochet
- Sk = Skip
- Sl St = Slip Stitch
- St/Sts = Stitch/Stitches
Instructions
- Rnd 1: Loosely ch 28, sc in 2nd ch from hook and into next 25 chs, 3 sc in last ch. Working on opposite side of starting chs, sc in free loops of next 25 chs, 2 sc in last ch; join with sl st in first sc. [56 sts]
- Rnd 2: Ch 1, 3 sc in same st as join, * sc in next 25 sts, 3 sc in next st, sc in next st*, 3 sc in next st; rep from * to * once; join with sl st in first sc. [64 sts]
- Rnd 3: Ch 1, sc in same st as join, * 3 sc in next st, sc in next 27 sts, 3 sc in next st*, sc in next 3 sts; rep from * to * once, then sc in last 2 sts; join with sl st in first sc. [72 sts]
- Rnd 4: Ch 1, sc in same st as join and into next st, * 3 sc in next st, sc in next 29 sts, 3 sc in next st*, sc in next 5 sts; rep from * to * once, then sc in last 3 sts; join with sl st in first sc. [80 sts]
- Rnd 5: Ch 1, sc in same st as join and into next 2 sts, * 3 sc in next st, sc in next 31 sts, 3 sc in next st*, sc in next 7 sts; rep from * to * once, then sc in last 4 sts; join with sl st in first sc. [88 sts]
- Rnd 6: Ch 1, sc in same st as join and into next 3 sts, * 3 sc in next st, sc in next 33 sts, 3 sc in next st*, sc in next 9 sts; rep from * to * once, then sc in last 5 sts; join with sl st in first sc. [96 sts]
- Rnds 7-50: Ch 1, sc in same st as join and into each st around; join with sl st in first sc. [96 sts]
Handles
- Lay the bag flat to place your markers for the handles. Count over 14 sts on the sides of the bag and place stitch marker in 15th stitch. This leaves 20 sts marked off in the middle. Do the same on the other side. Stitch markers should align on each side of the bag. Do not crochet into the 20 stitches in the middle.

- Rnd 51: Ch 1, sc in same st as join and into each st up to marked st, * loosely ch 60 (or any number depending on how long or short you want the handles), sk the 20 sts marked off in the middle*, sc in next 28 sts; rep from * to * once; then sc in remaining sts; join with sl st in first sc. [56 sts and 120 chs]
- Note: Work into the back bumps of the chs to keep things looking the same on both sides of the handle.
- Rnd 52: Ch 1, sc in same st as join and into each st and into each ch around; join with sl st in first sc. [176 sts]
- Rnds 53-56: Ch 1, sc in same st as join and into each st around; join with sl st in first sc. Fasten Off at last rnd. [176 sts]


Love this bag 😍
I bought the ad free pattern, it’s a great, easy to follow pattern.
how do i stop the seam from being on an angle?
Love the love of this bag and will enjoy making it.
I love how your crochet bag turned out! I wish I could crochet too! Also, I wanted to drop a quick message to let you know that I featured your tutorial on Crafts on Display, a growing community of crafting enthusiasts. You can check it out here – https://craftsondisplay.com/crochet/single-crochet-bag-32591/