
Single Crochet Beanie Pattern


This single crochet beanie pattern is very simple, yet the perfect hat for cold winters. It has been updated for clarity, making it easy for beginners to follow. Plus, I’ve provided clear instructions on how to make this as a plain and simple hat along with a striped edge, or a row of cross stitches along the edge.
Although perfect for beginners to learn to crochet, this beanie is perfect for everyone to make and wear and to gift to their family and friends. Plus, this free pattern is perfect for both genders.


The Size
This crochet beanie pattern is given in one size to fit the average adult. However, it is super easy to adjust to any size you need from babies to adults. To adjust the size refer to this crochet hat size chart.
Simply take measurements of your head circumference and then use the chart below to crochet the crown to the size needed before working in a straight pattern.

The Yarn
Originally I chose Red Heart Comfort, which is economical but not as luxurious as you might like for a crochet hat. Therefore, I decided to play around with a few other yarns including Caron Simply Soft and Vanna’s Choice, with Vanna’s Choice being my favorite of the three. I found it gave more stretch to the hat. Another thing to increase the stretch is using a large hook size than what the yarn recommends.
Choose your favorite worsted weight yarn and hook size to crochet this up.


How it’s Made
This is an easy crochet beanie pattern for every skill level including absolute beginners. It is worked in single crochets and is started at the crown and worked down. The rounds at the crown are increased at each round until you have the diameter that you need for your size. Then the beanie is worked in an even pattern until you have the length you want.
The pattern uses basic crochet stitches, however, a few alternatives are given for those who have mastered the basics and want a little something more for their hat.
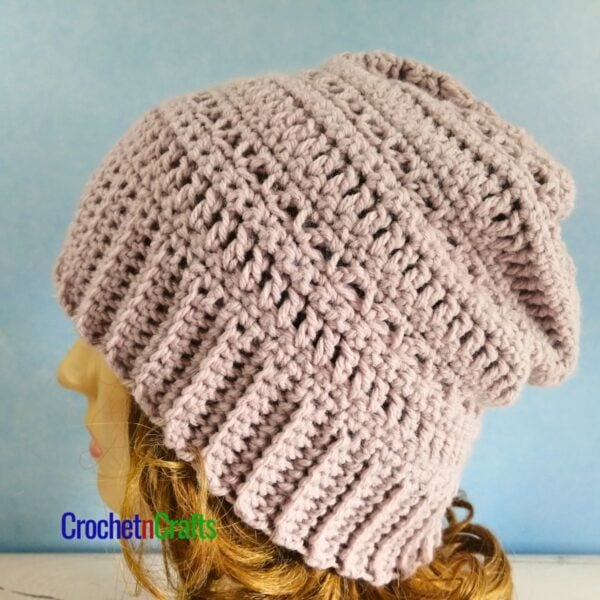
For the final rounds you have several options on how to finish the beanie. Above it is shown plain, but you also have the option for a striped look, which is shown below. With that said, you can do that striped look throughout the beanie pattern, or whichever striped design you like.
Another option is to work a round of cross stitches along the brim for an even different look. This is actually one of my favorites. It’s the perfect finish for women and girls, as it adds a bit of lace to a plain design. With that said, you would experiment with many other stitches here as well, like the puff stitch, slanted cluster or the bead stitch.


Single Crochet Beanie Pattern
Skill Level
Materials
- Yarn: Vanna's Choice (Worsted Weight, #4; 100% acrylic; 3.5oz/100g; 170 yds/156 m) 1 ball of Main Color and small amount of contrasting color for striped options.
- Crochet Hook: I/9-5.50mm
- Other: Measuring Tape, Scissors, Yarn Needle.
Measurements
- Gauge: 8 sts and 10 rows = 2.5".
- Finished Size: When laying flat it measures approximately 10.75″ across and 8.25″ from top to bottom.
Abbreviations
- MC = Main Color
- CC = Contrasting Color
- Ch/Chs = Chain/Chains
- Dc = Double Crochet
- FO = Fasten Off
- Hk = Hook
- Rep = Repeat
- Rnd/Rnds = Round/Rounds
- Sc = Single Crochet
- Sk = Skip
- Sl St = Slip Stitch
- St/Sts = Stitch/Stitches
- YO = Yarn Over
Special Stitch Instructions
- Crossed DC Stitch: Skip a st and dc into next st, then backtrack and dc into skipped st. When working into the skipped st, yo and insert your hk from the front as normal, yarn over and finish the dc as normal.
Instructions
- Rnd 1: With MC, Ch 2, work 6 sc into 2nd ch from hk; join with sl st in first sc. [6 sts]
- Rnd 2: Ch 1, 2 sc in same st as join and into each st around; join with sl st in first sc. [12 sts]
- Rnd 3: Ch 1, sc in same st as join, 2 sc in next st, *sc in next st, 2 sc in next st; rep from * around; join with sl st in first sc. [18 sts]
- Rnd 4: Ch 1, sc in same st as join, sc in next st, 2 sc in next st, *sc in next 2 sts, 2 sc in next st; rep from * around; join with sl st in first sc. [24 sts]
- Rnd 5: Ch 1, sc in same st as join, sc in next 2 sts, 2 sc in next st, *sc in next 3 sts, 2 sc in next st; rep from * around; join with sl st in first sc. [30 sts]
- Rnd 6: Ch 1, sc in same st as join, sc in next 3 sts, 2 sc in next st, *sc in next 4 sts, 2 sc in next st; rep from * around; join with sl st in first sc. [36 sts]
- Rnd 7: Ch 1, sc in same st as join, sc in next 4 sts, 2 sc in next st, *sc in next 5 sts, 2 sc in next st; rep from * around; join with sl st in first sc. [42 sts]
- Rnd 8: Ch 1, sc in same st as join, sc in next 5 sts, 2 sc in next st, *sc in next 6 sts, 2 sc in next st; rep from * around; join with sl st in first sc. [48 sts]
- Rnd 9: Ch 1, sc in same st as join, sc in next 6 sts, 2 sc in next st, *sc in next 7 sts, 2 sc in next st; rep from * around; join with sl st in first sc. [54 sts]
- Rnd 10: Ch 1, sc in same st as join, sc in next 7 sts, 2 sc in next st, *sc in next 8 sts, 2 sc in next st; rep from * around; join with sl st in first sc. [60 sts]
- Rnd 11: Ch 1, sc in same st as join, sc in next 8 sts, 2 sc in next st, *sc in next 9 sts, 2 sc in next st; rep from * around; join with sl st in first sc. [66 sts]
- Rnd 12: Ch 1, sc in same st as join, sc in next 9 sts, 2 sc in next st, *sc in next 10 sts, 2 sc in next st; rep from * around; join with sl st in first sc. [72 sts]
- Note: For a larger size continue with the increase rounds as established making 6 increases in each round. For a smaller size, do fewer increase rounds.
- Rnd 13: Ch 1, sc in same st as join and into each st around; join with sl st in first sc. [72 sts]
- Rnds 14-34: Rep Rnd 13. FO at last Rnd.
Variations for Edge
- Striped Edge

- Work hat pattern as instructed up to Rnd 27 or until you are about 1.75" away from desired hat height. Join Rnd 27/Last Rnd with CC. Then work the following Rnds:
- Rnd 28: With CC, rep Rnd 13.
- Rnd 29: With MC, rep Rnd 13.
- Rnd 30: With CC, rep Rnd 13.
- Rnd 31: With MC, rep Rnd 13.
- Rnd 32: With CC, rep Rnd 13.
- Rnds 33-34: With MC, rep Rnd 13. FO at last Rnd.
- Crossed Double Crochet Edge
- Work hat pattern as instructed up to Rnd 27 or until you are about 1.5" away from desired hat height. Join Rnd 27/Last Rnd with CC. Then work the following Rnds:
- Rnd 28: With CC, ch 1, sc in same st as join and into each st around; join with sl st in first sc.
- Rnd 29: Sk first st where join was made, Sl st in next st with MC, ch 2 (does not count as stitch), dc in same st, backtrack and dc in skipped st where join was made, (first crossed dc made), *sk next st, dc in next st, dc in skipped st; rep from * around; with CC, join with sl st in first dc.
- Rnd 30: With CC, ch 1, sc in same st as join and into each st around; With MC, join with sl st in first sc. FO CC.
- Rnds 31-32: With MC, rep Rnd 13. FO at last Rnd.


I can not print off this pattern in pdf form even though I signed for the email.
Very disappointing. It looked like there were some great patterns on this site.
Hi Cherry, sorry I had to remove the print option because of copyright violation. :( I’m working on making all pdfs available for purchase, while at the same time trying to make more patterns available for free for subscribers as well. It’s a lengthy process to go back and add the pdfs, but I’ll definitely push this up as one of my next freebies. :) Thank you for the feedback. :)