
Puffy Spike Stitch Tutorial
The puffy spike stitch is an excellent stitch for adding beautiful details to both sides of your crocheted work. Although the stitch does look slightly different on the wrong side, it’s not that noticeable. Unless you look closely, you might not even see the difference.

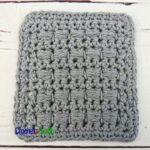
The first image below shows the right side of the fabric. And the second image below shows the wrong side. They are basically the same except for the slant is in the opposite direction.


The stitch is basically a combination of the spike and puff stitches. It is worked by going down into the rows beneath and drawing up loops. All loops are kept on the hook until the last loop is drawn up. The yarn is then wrapped over the hook and pulled through all the loops on the hook. The stitch is then closed off with a chain.
You could work this crochet stitch in a solid color, but if you work the spike stitch row in a contrasting color you get a very pretty textured design.
For this spike stitch crochet tutorial I’ll show you how to make it with five spikes. But if you wanted to, you could also make it with three or seven spikes. The concept is the same for all three – you just need more space to work the seven spikes than you do for the three spikes. If you want to see the variations, scroll down to the bottom for some images.
To calculate the number of chains you need for your foundation chain, decide on which puff stitch you want to use and how many stitches you want to have in between each spike stitch.
For example, if you’re using the one with three spikes, and would like to have three stitches in between the spike stitches, then you would need to chain a multiple of six + one. If you want the spike stitch with five stitches and have three stitches in between, then you would need to chain a multiple of eight +1 for the starting chain.
The reason you need that extra chain is when you go to work your first stitch, you work it into the second chain from the hook.
A Few Patterns Using the Crochet Puff Spike Stitch
- Puffy Spike Stitch Christmas Crochet Blanket for Toddlers
- Puffy Spike Stitch Crochet Tote Bag
- Puffy Spike Stitch Case
- Puffy Spike Stitch Wine Bottle Cozy
- Puffy Spike Stitch Belt

Crochet Puff Spike Stitch
Step 1:
- To get started, work at least 6 rows of single crochets using color A. In the last stitch of the last row, change to color B.
- Then to make the puffy spike stitch, and using the new color, make your stitches up to where the puffy spike stitch is to go. Skip the next stitch and place a stitch marker into the next stitch. I'm lazy when it comes to using stitch markers, but in this case you need a marker there in order to know which stitch to crochet into next. Otherwise the puff stitch will cover the area and you might end up guessing.
- The skipped stitch is the center point of where the puff stitch is made and will not be worked into. This is the stitch from where you do all your counting to the right and left.


Step 2:
- Count over 2 stitches to the right and 1 down. You don't need a stitch marker here, but I used one to show where you will make your first spike.

Step 3:
- With yarn over hook, insert your hook into the marked stitch (2 sts to right and 1 row below). Wrap the yarn over and pull through. 3 loops on the hook.

Step 4:
- Now count over 1 stitch to the right and 2 down. Again, I used a stitch marker, but it's not needed for when you crochet.

Step 5:
- With yarn over hook, insert your hook into the marked stitch (1 st to right and 2 rows below). Wrap the yarn over and pull through. 5 loops on the hook.

Step 6:
- The third spike is worked straight down 3 rows below.

Step 7:
- With yarn over hook, insert your hook into the marked stitch (3 rows below). Wrap the yarn over and pull through. 7 loops on the hook.

Step 8:
- Moving over to the left now, count over 1 stitch to the left and 2 rows below.

Step 9:
- With yarn over hook, insert your hook into the marked stitch (1 st to the left and 2 rows below). Wrap the yarn over and pull through. 9 loops on the hook.


Step 10:
- The last spike is worked 2 stitches to the left and 1 row below.

Step 11:
- With yarn over hook, insert your hook into the marked stitch (2 sts to the left and 1 row below). Wrap the yarn over and pull through. 11 loops on the hook.

Step 12:
- Yarn over and pull through all 11 loops.

Step 13:
- Chain 1 to close the stitch.

Step 14:
- Work your next single crochet into the marked stitch of current row. (Now you see why we mark that because it's hard to see where the next stitch is to go without a marker.)
- This is the top view of the stitch. When you count your stitches it looks like you have 10 stitches in the row, but really you only have 9. If you look closely you'll see that the one loop is smaller than the rest. This is technically the top of the spike stitch, but it's much easier to skip that one and work into the stitches beside it.
- In this image you can see that the tighter stitch sits directly over the puffy spike stitch.


The Variations
- Here are the three variations of the puffy spike stitch.


Beautiful
Do you have a video tutorial for this pattern? that will be very helpful.
No I don’t at the moment. Sorry.
What the multiple for the Patten
It all depends on how many spikes and how many stitches you want in between the spikes. For this tutorial I did 5 spikes and I believe I had 3 sts in between the spikes for a total of 8. You can do this with 3, 5 or 7 spikes, and then have any number of sts in between to give you the look you want. :)
The stitch is lovely but is there an actual pattern for a blanket?
Sorry not yet… It’s on my to-do list, but I’m not sure when I’ll get to it.