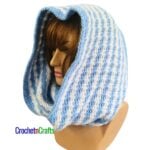
Puffy Spike Stitch Case
Use this puffy spike stitch case to store your crochet tools or use it as a pencil case. I use it to store my calculator, small notepad, pencil, stitch markers, scissors and other tools that I frequently need when crocheting. I’ve been spending a lot of time away from home this summer, so it has already served me well. (Yes, it is another pattern that has been laying around for a while. I actually have quite a few patterns that I started a while ago, including a bag to match this case.)

This pouch is crocheted using the single crochet and the puffy spike stitch. Both stitches take a while to crochet with, but in the end you get a nice sturdy pouch that you can leave as is or line it. I left mine as is, but now wish I had lined it because my pointy tools like to peek out from time to time. Definitely don’t store your small hooks unless you line it.
Here is a photo tutorial on how to make the puffy spike stitch. In this pattern I made it with 5 spikes, but you can also make it with three or seven spikes. The stitch is beautiful on both sides of the fabric.
Red Heart Comfort


Puffy Spike Stitch Case
Skill Level
Materials
- Yarn: Red Heart Comfort
- Crochet Hook: H/8-5.00mm
- Other: Zipper
- Material for Lining
- Tools: Measuring Tape, Scissors, Stitch Marker, Yarn Needle.
Measurements
- Gauge: 3" across 10 sc sts and over 12 rows.
- Finished Size: When laying flat it measures 10.5" across and 5" from top to bottom.
Abbreviations
- Ch/Chs = Chain/Chains
- FO = Fasten Off
- Hk = Hook
- Lp/Lps = Loop/Loops
- Pss = Puff Spike Stitch
- Rep = Repeat
- Rnd/Rnds = Round/Rounds
- Sc = Single Crochet
- Sk = Skip
- Sl St = Slip Stitch
- Sp/Sps = Space/Spaces
- St/Sts = Stitch/Stitches
- YO = Yarn Over
- Crochet Abbreviations and Terms are in American.
Special Stitch Instructions
- Puffy Spike Stitch (PSS): Before making the pss, sk the first st and place st marker in next st.
- Yo, insert hk 2 sts to the right and 1 row down, yo and pull through (3 lps on hk); yo, insert hk 1 st to the right and 2 rows down, yo and pull through; yo, insert hk in st below and 3 rows down, yo and pull through; yo, insert hk 1 st to the left and 2 rows down, yo and pull through, yo, insert hk 2 sts to the left and 1 row down, yo and pull through; (11 lps on hk), yo and pull through all 11 lps, ch 1 to close the st.
- Puffy Spike Stitch
Note
- For this pattern it is important that you keep the seam straight if you want the puffy spike stitches to line up above each other.
Helpful Links
Instructions
- Rnd 1: With first color, ch 28, sc in 2nd ch from hk and in next 25 chs, 3 sc in last ch. Working on opposite side of starting chs, sc in free lps of next 25 chs, 2 sc in last ch; join with sl st to first sc. (56 sts)
- Rnd 2: Ch 1, 3 sc in first st, *sc in next 25 sts, 3 sc in next st, sc in next st*, 3 sc in next st; rep from * to * once; join with sl st to first sc. (64 sts)
- Rnd 3: Ch 1, sc in first st, *3 sc in next st, sc in next 27 sts, 3 sc in next st*, sc in next 3 sts; rep from * to * once, then sc in last 2 sts; join with sl st to first sc. (72 sts)
- Rnds 4-9: Ch 1, sc into first st and into each st around. (72 sts)
- Rnd 10: Join next color, ch 1, sc in first 8 sts, *work pss, sc in marked st and in next 7 sts; rep from * around to last st; work pss; join with sl st to first sc. (8 pss sts and 64 sc sts)
- Note: When you get to the pss sts you will see 2 sps on top into which you can potentially work into. Work into only one of those sps in order to maintain the correct amount of sts.
- Rnds 11-14: Ch 1, sc in first st and in each st around; join with sl st to first sc. (72 sts)
- Repeat rnds 10 to 14 once. FO.
- Sew in a zipper. For extra strength you can also line this pouch.
- Use your case to store your crochet tools or as a pencil case.