Crochet Tote

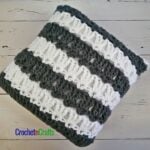
This crochet tote features a basic zig-zag open lace pattern that you’ll enjoy. It’s great for the summer markets, the beach, or as an everyday shoulder bag.

The only thing with this tote is that the rows of single crochets tend to buckle, or pucker, when stretched vertically. To solve this, you will need to line the bag. Since the bag has an open stitch, you will need to add a double lining to hide the seams. Here is a step-by-step tutorial on how to line a crocheted bag.
How to Make a Crochet Tote
This tote is started at the bottom in a rectangle with single crochets. The stitches are increased at each round until you have the desired size, at which point you begin working in an even pattern for the body of the bag.
The body is worked in an open stitch pattern, which makes this perfect for the markets in the summer months. If you increased the bottom, you could also use this as a beach bag to hold all your beach accessories.
The handles are worked directly onto the bag without fastening off. They can easily be customized to the length that you want.
Recommended Yarn for a Market Bag
A worsted weight cotton yarn, makes this bag strong and durable, especially if you plan on using it as a bag for the market. I used Bernat Handicrafter Cotton, a medium weight #4 yarn along with a 5 mm crochet hook.
If you plan on lining the bag with a strong and sturdy material, then you can basically choose any yarn, including an acrylic! As a matter of fact, I think this would look really good if stretched out over a contrasting lining. Not only would it look nice, but it would help for the stitches to maintain their shape.
How Big to Crochet the Bag
The finished size as given measures 13.5 inches wide by 14.5 inches high after blocking. But, you can easily customize the size by increasing or decreasing the bottom. The stitch multiple for the body is four, so you can stop at any round along the bottom to make it work. The handles too, can be adjusted for any size bag.
Other Crochet Bag Patterns to Try
- Single Crochet Bag
- Over-The-Shoulder Crochet Bag
- Crochet Bag Pattern – Lacy Textures
- Crochet Handbag
- Blossom Crochet Beach Bag Pattern

Crochet Tote
Skill Level
Materials
- Yarn: Bernat Handicrafter Cotton (Worsted Weight, #4; 100% Cotton; 400g/14oz; 650 meters/710yds) Color: Off White, 1 ball
- Crochet Hook: H/8-5.00mm
- Other: Measuring Tape, Scissors, Stitch Markers, Yarn Needle.
Measurements
- Gauge: 14 sc sts = 4".
- Finished Size (Laid Flat): 13.5" wide by 14.5" high after blocking.
Abbreviations
- Ch/Chs = Chain/Chains
- Lp/Lps = Loop/Loops
- Rep = Repeat
- Sc = Single Crochet
- Sk = Skip
- Sl St = Slip Stitch
- St/Sts = Stitch/Stitches
- Stsc = Standing Single Crochet
Note
- You will need to line this tote to prevent the stitches from stretching vertically. Since the stitches are open, a double lining is essential to hide the seams.
Instructions
- Rnd 1: Loosely ch 28, sc in 2nd ch from hook and in next 25 chs, 3 sc in last ch. Working on opposite side of starting chs, sc in free lps of next 25 chs, 2 sc in last ch; join with sl st in first sc. [56 sts]
- Rnd 2: Ch 1, 3 sc in same st as join, * sc in next 25 sts, 3 sc in next st, sc in next st*, 3 sc in next st; rep from * to * once; join with sl st in first sc. [64 sts]
- Rnd 3: Ch 1, sc in same st as join, * 3 sc in next st, sc in next 27 sts, 3 sc in next st*, sc in next 3 sts; rep from * to * once, then sc in last 2 sts; join with sl st in first sc. [72 sts]
- Rnd 4: Ch 1, sc in same st as join and in next st, * 3 sc in next st, sc in next 29 sts, 3 sc in next st*, sc in next 5 sts; rep from * to * once, then sc in last 3 sts; join with sl st in first sc. [80 sts]
- Rnd 5: Ch 1, sc in same st as join and in next 2 sts, * 3 sc in next st, sc in next 31 sts, 3 sc in next st*, sc in next 7 sts; rep from * to * once, then sc in last 4 sts; join with sl st in first sc. [88 sts]
- Rnd 6: Ch 1, sc in same st as join and in next 3 sts, * 3 sc in next st, sc in next 33 sts, 3 sc in next st*, sc in next 9 sts; rep from * to * once, then sc in last 5 sts; join with sl st in first sc. [96 sts]
- Rnds 7-8: Ch 1, sc in same st as join and into each st around; join with sl st in first sc. [96 sts]
- Rnd 9: Sl st into next st, ch 1, (sc, ch 5) in same st, *sk next 3 sts, (sc, ch 5) in next st; rep from * around to last 3 sts; sk last 3 sts; join with sl st in first sc. [24 ch-5 lps]
- Rnd 10: Sl st into next 3 chs, ch 1, (sc, ch 3) in same ch as last sl st, *(sc, ch 3) in center ch of next lp and into each lp around; join with sl st in first sc. [24 ch-3 lps]
- Rnd 11: Ch 1, sc in same st as join and into each st and ch around; join with sl st in first sc. [96 sts]
- Rnd 12: Ch 1, (sc, ch 5) in same st as join, *sk next 3 sts, (sc, ch 5) in next st; rep from * around to last 3 sts; sk last 3 sts; join with sl st in first sc. [24 ch-5 lps]
- Rnds 13-32: Rep Rnds 10-12 ending with Rnd 11 at last rep.
- Rnd 33: Ch 1, sc in same st as join and into each st around; join with sl st in first sc. Fasten Off.
Handles
- Lay the bag flat to place your markers for the handles. Count over 14 sts on the sides of the bag and place stitch marker in 15th stitch. Counting the stitch markers, you should have 20 sts marked off in the middle. Do the same on the other side. Stitch markers should align on each side of the bag. Do not crochet into the 20 stitches in the middle.

- Rnd 34: My working stitch ended up one stitch to the left of my stitch marker that marks off the stitches in the middle.
- Rnd 34 (Continued): I fastened off and joined it with a stsc one stitch to the right of the marker, close to the seam.
- Rnd 34 (continued): * Loosely ch 60 (or any number depending on how long or short you want the handles), sk the 20 sts marked off in the middle*, sc in next 28 sts; rep from * to * once; then sc in remaining sts; join with sl st in first sc. [56 sts and 120 chs]
- Note: Work into the back bumps of the chs to keep things looking the same on both sides of the handle.
- Rnd 35: Ch 1, sc in same st as join and into each st and into each ch around; join with sl st in first sc. [176 sts]
- Rnds 36-39: Ch 1, sc in same st as join and into each st around; join with sl st in first sc. Fasten Off at last rnd. [176 sts]
- Here is a video tutorial on how to make the bag handles: