
Crocheting Into the Back Bump
Crocheting into the back bump is a bit trickier than into the front loops because you’re not only turning the chains over, but the back bumps tend to be a bit smaller and more difficult to get into than the front loops. To make it easier always make your starting chains loose, or use a slightly bigger hook for the chains.

This is a nice technique for keeping both the top and bottom of the stitches looking the same. It’s great for small projects where you don’t want an edging, but need a nice clean finish. My favorite time to crochet into the back bumps is when I crochet strings. You want the string narrow, but looking nice on both sides. And this is the perfect way to achieve that.
And best of all, a nice finish on both sides is much more professional if you plan on gifting or selling your finished items!
How to Crochet Into Back Bumps Video and Photo Tutorial
A few patterns that call for this technique are the curly cue hair scrunchie, this cowl scarf, this triple crochet scarf, and this ear warmer headband.
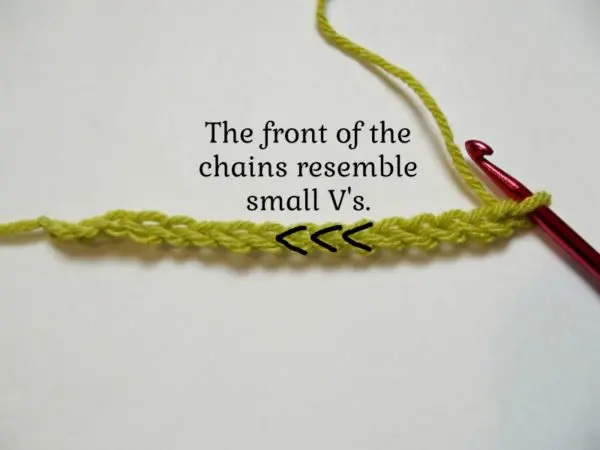
And here we go with the photo tutorial… in the first picture you see the top of the chains, which resemble small V’s. This is where you normally work your stitches into. But when working into the back bumps, you turn your chains over, as demonstrated in the next picture.
With the chains turned over, you see the back bumps sticking out on top. You’ll insert your hook under these bumps when the pattern says to work into the back bumps. So basically when you insert your hook you would have both the front loops (small V’s) at the back of the hook and the back bump is on top of the hook.

This is what it looks like from the side:

Here you see the tops of the stitches:

And here you see the bottom of the stitches:

Now do you see the beauty of crocheting into back bumps? Both top and bottom look like small V’s to give you that clean professional look!


