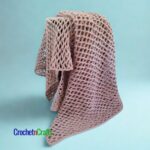
Bead and Lace Hat
This crocheted hat pattern is perfect for all seasons, including the summer. The open stitch allows the head to breathe and the brim can help to keep the sun out.
Wear it with all types of hair to accessorize or to add an extra layer of warmth in cooler weather.
You can make this with or without the brim. Either way, it makes for a nice gift idea for just about anyone.

The Size
This hat will fit a women’s small to average head. If you need a larger hat, you could try making it in a slightly thicker yarn and larger hook. You could also increase or decrease your stitch count as long as they are made in multiples of two.
Use this crochet hat size chart as a reference if you need to make adjustments. It’s always best to take measurements of your head circumference, but when not possible, a chart is the next best thing.

The Yarn
Originally I made this hat in an unknown cotton/polyester blend. I tried Caron Simply Soft, it worked but it didn’t come out quite as nice. Red Heart Shimmer, on the other hand, worked out well for one of my testers.
Experiment with your favorite yarn. It might even work out in a heavier DK weight yarn.

Subscribe for Free Crochet Patterns, Coupons, and Other Crafty Promotions.
You will also receive a PDF copy of the Pretty Simple Slouch Hat pattern.
Your email will not be shared. Unsubscribe any time. By subscribing, you agree to our privacy policy and terms of use.

Bead and Lace Hat
Skill Level
Materials
- Yarn: Red Heart Shimmer, or any similar yarn.
- Crochet Hook: G/6-4.00mm
- Tools: Measuring Tape, Scissors, Yarn Needle.
Measurements
- Gauge: Measures 3" over first 5 rounds.
- Finished Size: 21.5-21.75"
Abbreviations
- Ch/Chs = Chain/Chains
- FO = Fasten Off
- Hdc = Half Double Crochet
- Lp/Lps = Loop/Loops
- Rep = Repeat
- Rnd/Rnds = Round/Rounds
- Sc = Single Crochet
- Sk = Skip
- Sl St = Slip Stitch
- Sp/Sps = Space/Spaces
- St/Sts = Stitch/Stitches
- YO = Yarn Over
- See Crochet Abbreviations for more details
Special Stitch Instructions
- Bead Stitch Insert hk into indicated st, yo and pull through, (yo and pull through one lp on hk) twice, yo and pull through both lps on hk. When you work into the next stitch make sure the bobble is facing the right side.
Note
- The Ch-1's made at the beginning of each round do not count as a stitch. All other chain-1 spaces (ch- 1 sps) are referred to as stitches (sts) in this pattern.
Helpful Links
Instructions
- Ch 4, join with sl st to form ring.
- Rnd 1: Ch 1, work 2 sc into each ch around; join with sl st to first sc. (8 sc)
- Rnd 2: Ch 1, (hdc, ch 1) in first st and in each st around; join with sl st to first hdc. (8 ch-1 sps)
- Rnd 3: Ch 1, work 2 sc into first st and into each st around; join with sl st to first sc. (32 sts)
- Rnd 4: Ch 1, work bead st in first st, *sc in next st, bead st in next st; rep from * around to last st; sc in last st; join with sl st to first bead st. (32 sts)
- Rnd 5: Ch 1, 2 sc in first st, sc in next st, *2 sc in next st, sc in next st; rep from * around; join with sl st to first sc. (48 sts)
- Rnd 6: Ch 1, (hdc, ch 1) in first st, *sk next st, (hdc, ch 1) in next st; rep from * around to last st; sk last st; join with sl st to first hdc. (24 ch-1 sps)
- Rnd 7: Ch 1, 2 sc in first st, sc in next 2 sts, *2 sc in next st, sc in next 2 sts; rep from * around; join with sl st to first sc. (64 sts)
- Rnd 8: Same as rnd 4. (64 sts)
- Rnd 9: Ch 1, 2 sc in first st, sc in next 7 sts, *2 sc in next st, sc in next 7 sts; rep from * around; join with sl st to first sc. (72sts)
- Rnd 10: Same as rnd 6. (36 ch-1 sps)
- Rnd 11: Ch 1, 2 sc in first st, sc in next 5 sts, *2 sc in next st, sc in next 5 sts; rep from * around; join with sl st to first sc. (84 sts)
Working in Even Pattern
- Rnd 12: Ch 1, work bead st in first st, *sc in next st, bead st in next st; rep from * around to last st; sc in last st; join with sl st to first bead st. (84 sts)
- Rnd 13: Ch 1, sc in first st and in each st around; join with sl st to first sc.
- Rnd 14: Ch 1, (hdc, ch 1) in first st, *sk next st, (hdc, ch 1) in next st; rep from * around to last st; sk last st; join with sl st to first hdc. (42 ch-1 sps)
- Rnd 15: Same as rnd 13.
- Rnds 16-25: Continue with rnds 12 to 15 ending with rnd 13 at rnd 25. F.O. at last rnd.
Brim:
- Row 1: Count over 33 sts from where you fastened off. Join yarn with a sl st. Ch 1, 2 sc in next st, (sc in next 4 sts, 2 sc in next st) 3 times; sl st into next st. Turn. (20 sc sts)
- Row 2: Ch 1, 2 sc in first sc, (sc in next 5 sts, 2 sc in next st) 3 times, sc in last st, sc in next st in hat, sl st in next st. Turn. (25 sc sts)
- Row 3: Ch 1, 2 sc in first sc, sc in each st across to last st, 2 sc in last sc, 1 sc in next st in hat, sl st in next st. Turn (28 sc sts)
- Row 4: Same as row 3. (31 sc sts)
- Row 5 (Edging Row): Ch 1, 2 sc in first sc, sc in each st across to last st, 2 sc in last sc, sc into next st in hat and into each st around; join with sl st to first sc. F.O.


crochetpatternbonanza.com