
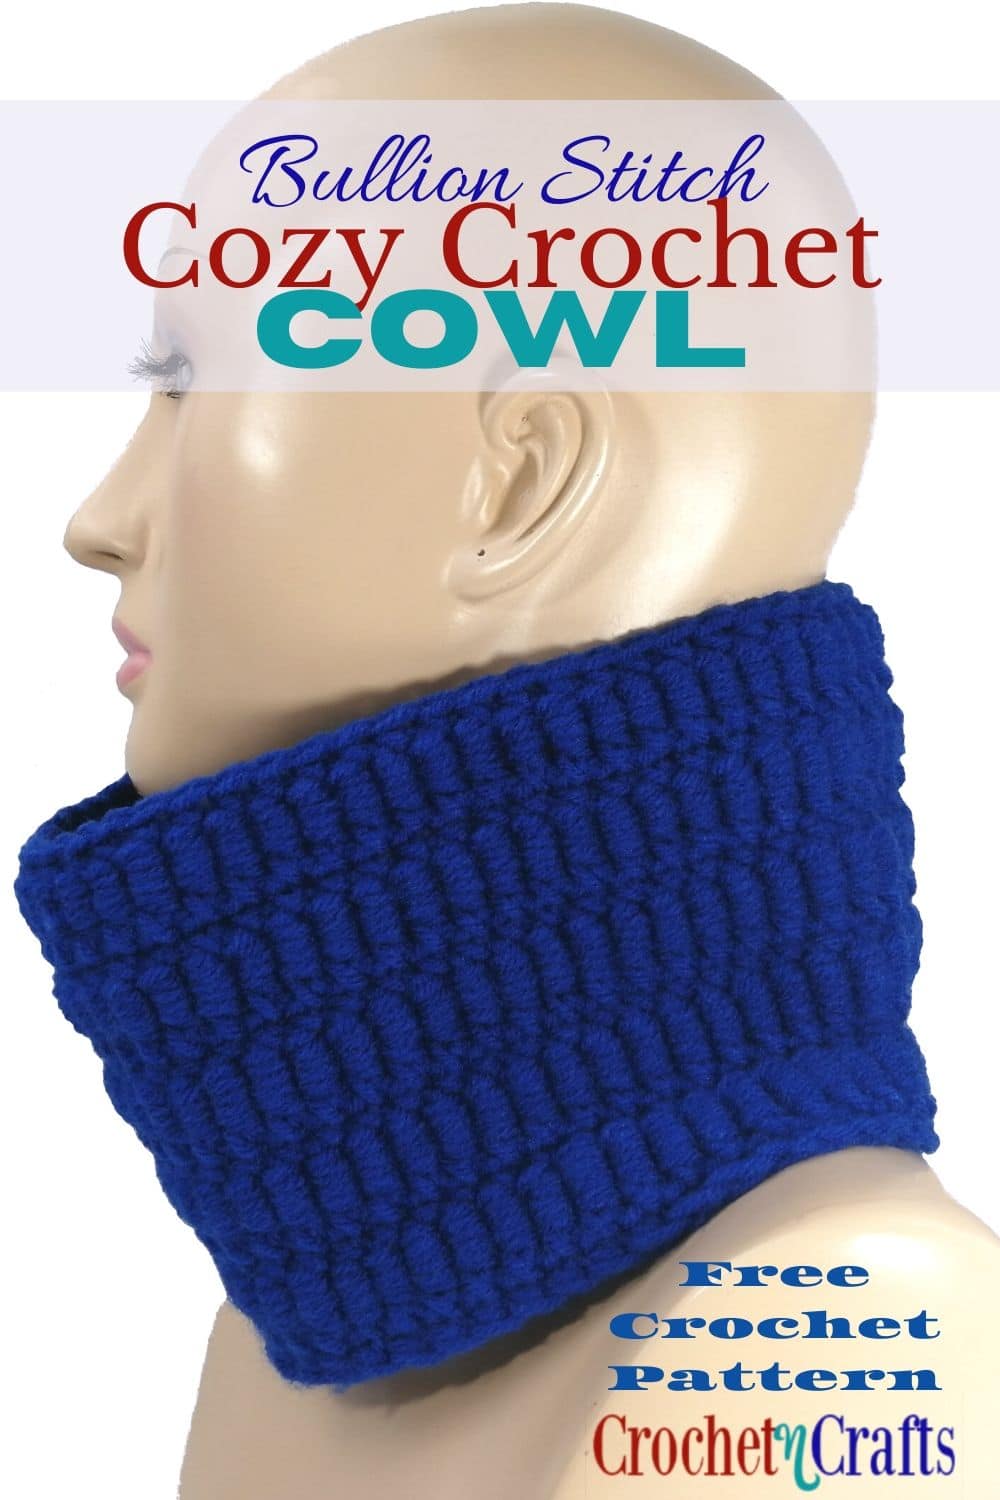
Bullion Stitch Cozy Crochet Cowl

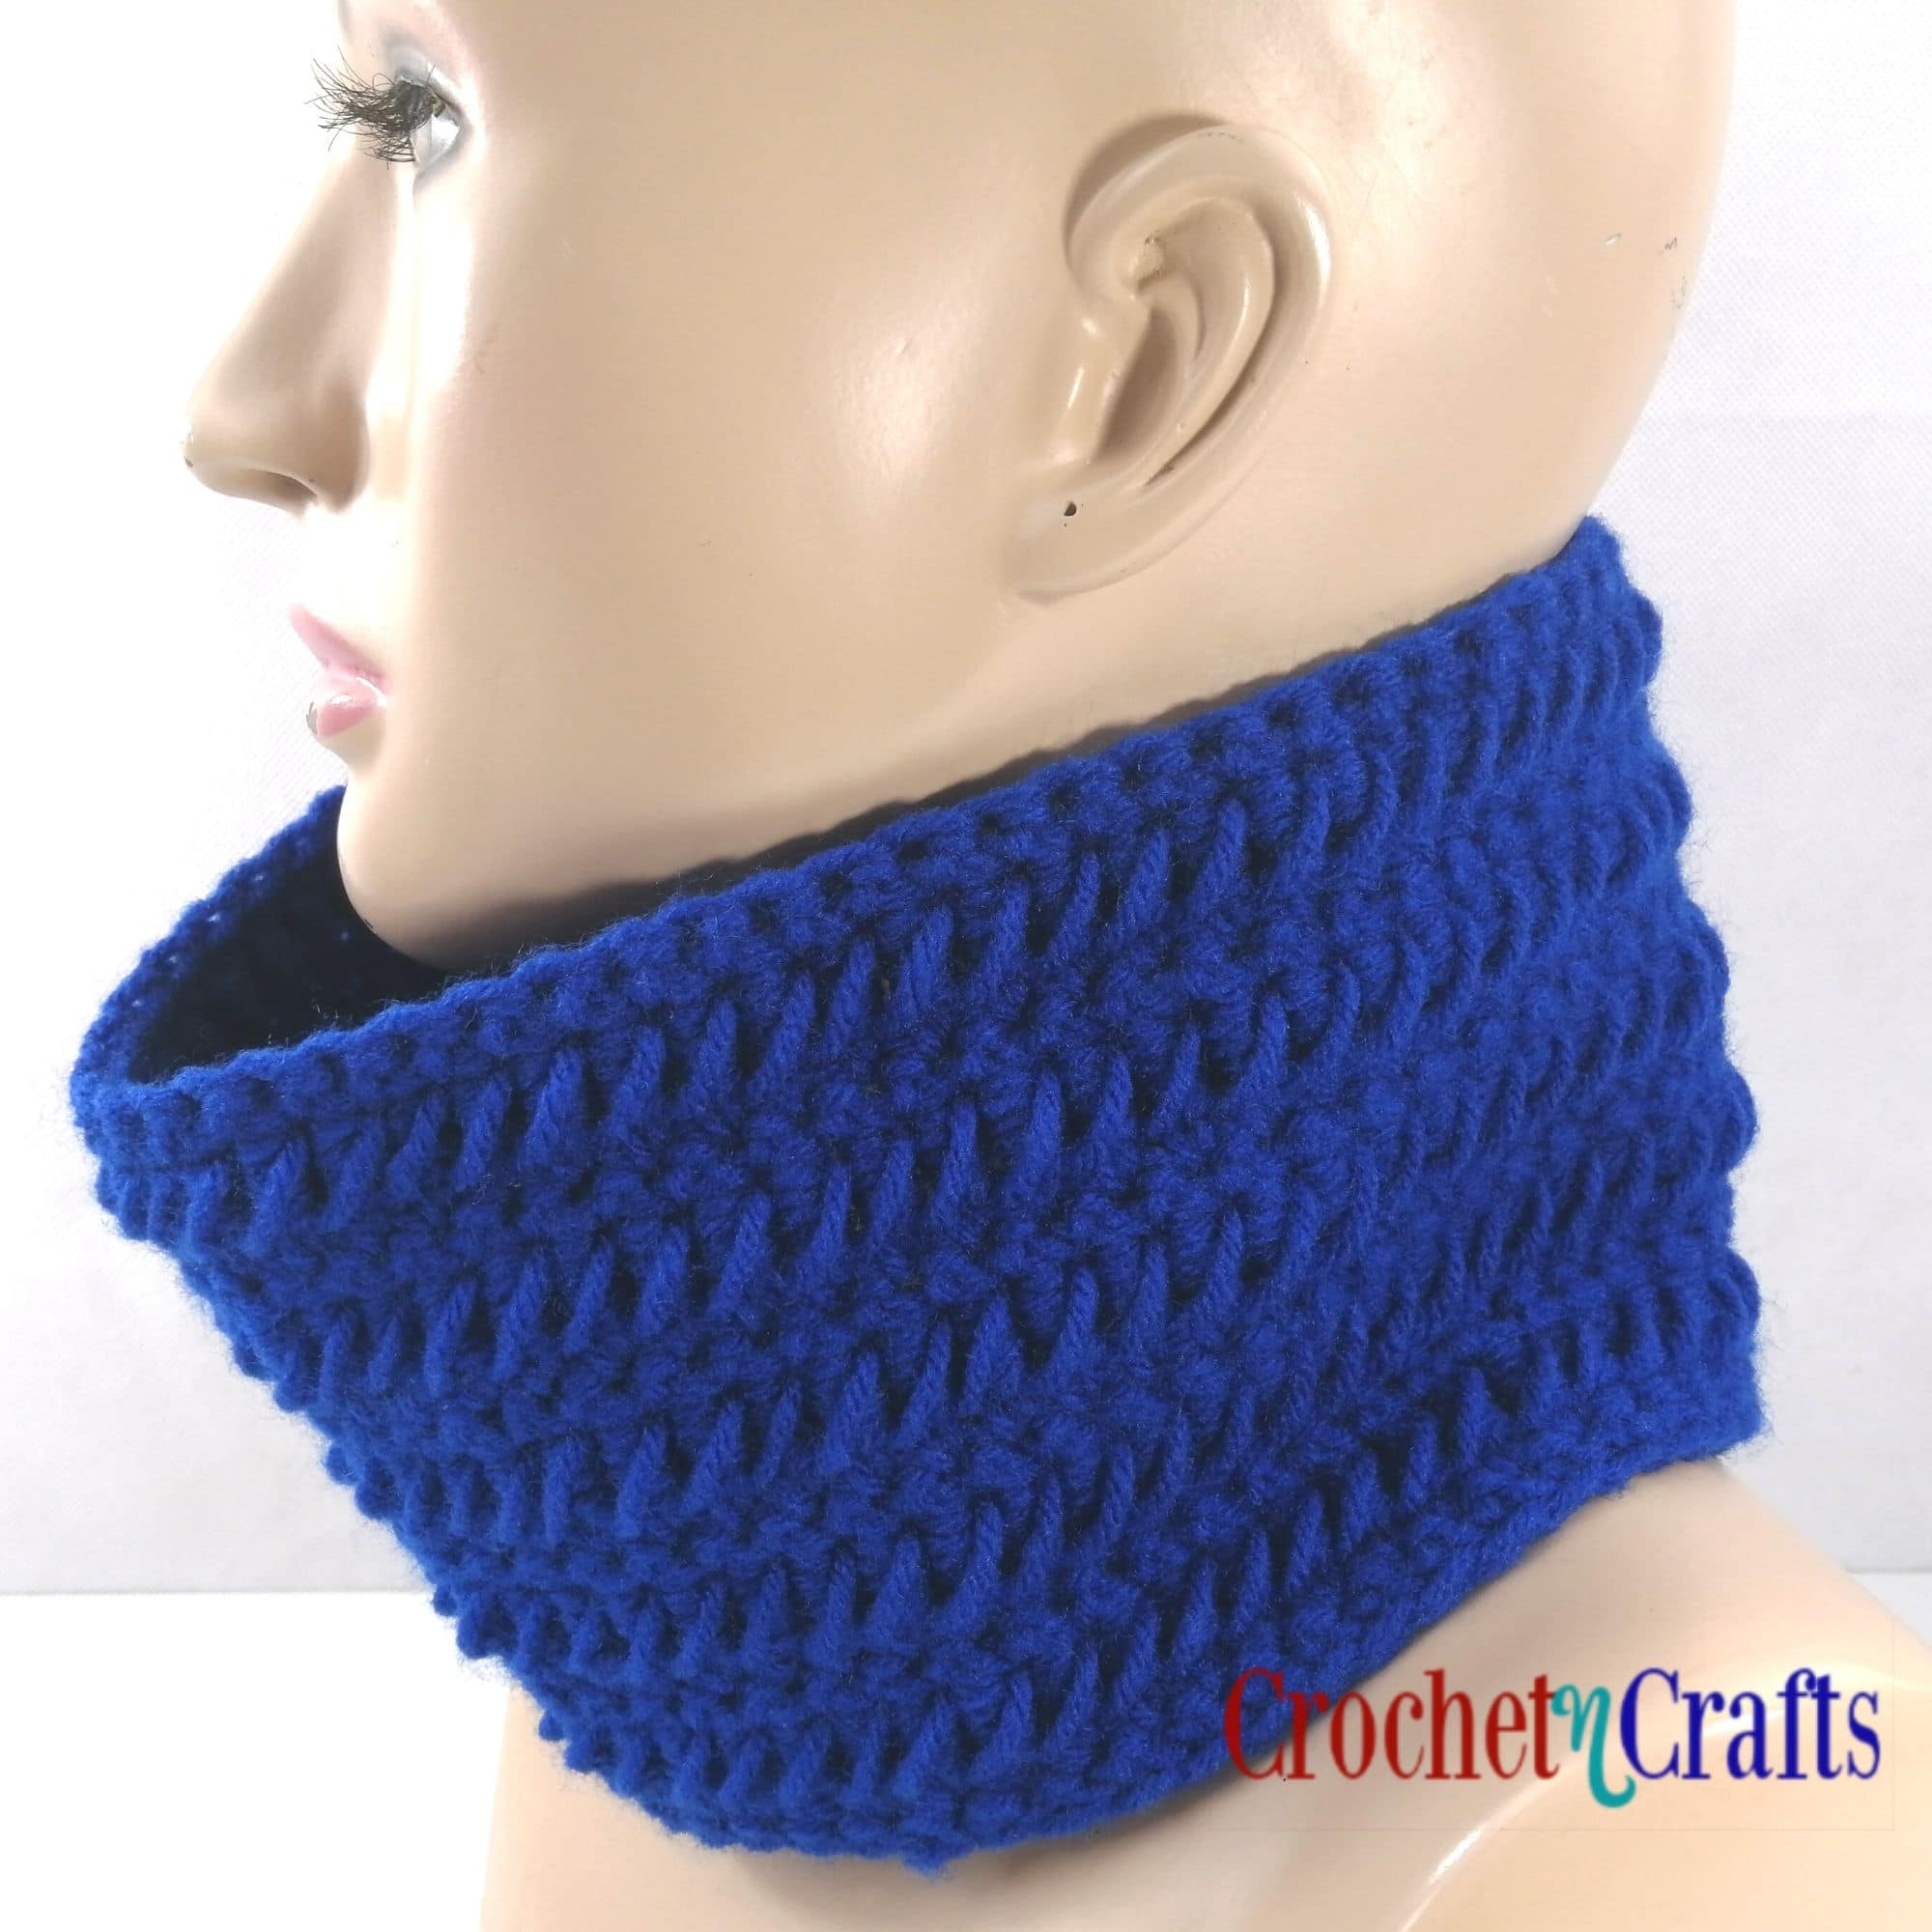
The bullion stitch cozy crochet cowl is perfect for keeping your chin and neck cozy against the cold winter wind. It’s nice and sturdy, so it stays up on its own. Plus, there is no stitch multiple, so you can easily make this for any size that you need.
The way the bullion stitches are worked in this pattern makes it look great on both sides of the fabric. On the one side, you can see the rolls in neat rows, and on the other side, you have a slanted strand that goes over the bullion stitches. This is because I did not use a chain one to close the bullion stitches.


Get Your PDF Copy. Shop Etsy & Save 25% with coupon code: CNC25
You Might Also Enjoy These Shawl Patterns:


Subscribe for Free Crochet Patterns, Coupons, and Other Crafty Promotions.
You will also receive a PDF copy of the Clustered V-Stitch Crochet Cowl pattern.
Your email will not be shared. Unsubscribe any time. By subscribing, you agree to our privacy policy and terms of use.
Bullion Stitch Crochet Cowl Pattern Information
Skill Level: Intermediate
Materials
- Yarn: Red Heart Super Saver (Worsted Weight (#4) 100% acrylic, 7 oz/198g – 364 yds/333m) 1 Skein.
- Crochet Hook: I/9-5.50mm
- Other: Measuring Tape, Scissors, Yarn Needle.
Measurements
- Gauge: 3″ over 8 sc. Gauge is not that important as you can adjust as needed.
- Finished Size: 5.25″ by 11″ laying flat.
Abbreviations
- Bullion St = Bullion Stitch
- Ch/Chs = Chain/Chains
- FO = Fasten Off
- Hk = Hook
- Lp/Lps = Loop/Loops
- Sc = Single Crochet
- Sl St = Slip Stitch
- St/Sts = Stitch/Stitches
- YO = Yarn Over
Special Stitch Instructions
- Standing Bullion Stitch: Make a slip knot and place it on your hook. Then follow instructions for regular bullion stitch.
- Bullion St: YO 6 times, insert hk into designated st, yo and pull through (8 lps on hk), yo and pull through all lps on hk. Bullion Stitch Tutorial
Notes
This pattern is fastened off prior to each round with the bullion stitches. This way, you can start the bullion stitch rounds with a standing stitch for a cleaner seam.
See photos below on how to carry the tail end of the yarn up across the first bullion stitch to maintain the same texture throughout.
Start your bullion stitch round with a standing bullion stitch as instructed in the pattern and complete the round.
The image below shows that the first bullion stitch in the round does not have a slant going across.
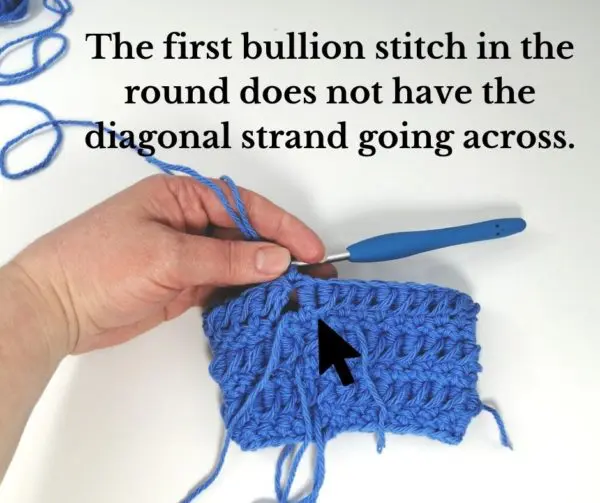
To fix this, simply take your tail end from where you fastened off at the previous row and bring it up across as shown.
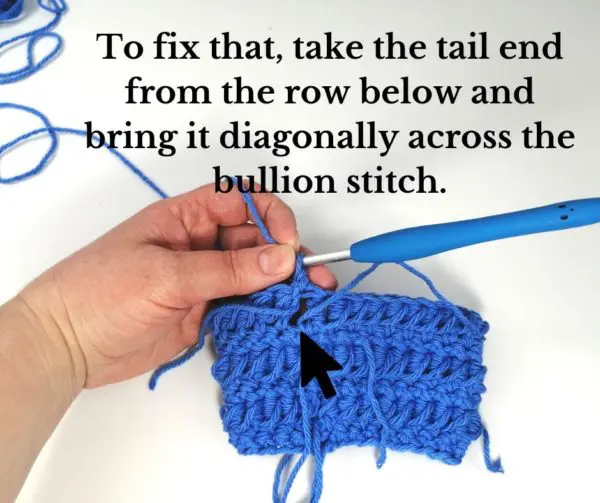
Then secure the strand by crocheting over it, starting with the second single crochet of the next round.
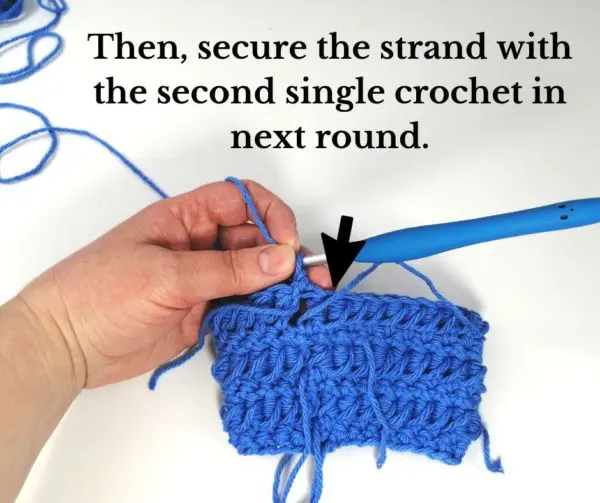
Here, the second single crochet in the next round is complete, and you can see the strand is going across the first bullion stitch, as in the other bullion stitches.

Cozy Crochet Cowl Pattern Instructions
Ch 60, or any number of chains needed to fit around chin. Join with sl st in first ch being careful not to twist chs.
Rnd 1: Ch 1, working into back bumps, sc in same ch as join and into each ch around; join with sl st in first sc. FO. [60 sts]
Rnd 2: Work a standing bullion st in same st as join, bullion st into next st and into each st around; join with sl st in first bullion st. [60 bullion sts]
Rnd 3: Ch 1, sc into same st as join, then take tail end from previous single crochet round below and bring it up to next st, sc into next st making sure to work over the tail end. Sc in next st and into each st around; join with sl st in first sc. [60 sts] FO.
Rnds 4-11: Repeat Rnds 2 & 3 until you have reached a desired width. [60 sts] FO.
Video Tutorial
If the video below is not displaying, please ensure you do not have an ad-blocker enabled.


