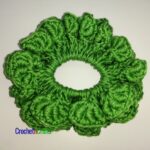
Lacy Shell Large Crochet Beach Bag Pattern
This large crochet beach bag pattern is perfect for all your beach items, including your towels and outfits! Pictured here are two towels, leaving lots more room for outfits and more!

Not only is this perfect for the beach, but also for the market, or for everyday use for a busy mom. It’s a beautiful tote, with a nice lacy and textured stitch pattern that you’ll enjoy taking with you everywhere you go.
Finished Size
This bag is quite large! Especially when you factor in the amount of stretch that you’ll get once you begin to fill the bag. But, you can easily increase or decrease the size to your needs.
- Finished Size (Laid Flat): 20.5″ wide by 18″ high, not including the handles.
- Base Measurement: 14.5″ by 6.5″

How Do You Crochet A Large Beach Bag?
This crochet bag is started at the bottom and worked to the top in one piece, including the handles! That means there are no ends to weave in, except of course the beginning and end.
The Bottom. I like to start my bags at the bottom, with a solid single crochet rectangle. I work it in the round, because it is easiest for me. I simply make a series of chains, then single crochet on both sides to form a rectangle, increasing at each corner of each round.
You can easily increase or decrease the amount of rounds you do for the base for a smaller or bigger bag.
A few links that might help:
The Sides (Body of the Bag). The sides are worked in a pretty and lacy shell, along with the bead stitch for added textures. The pattern is easy to follow, just make sure to note the rounds that require you turn.
The stitch multiple for the body is a multiple of four, in case you want to make changes to the size.

The Handles. As already mentioned, the handles are worked in one piece with the bag. As with the rest of the bag, they are easy to customize to any length that you might need by making more or less chains in round 45.
If you made changes to the bag size, you will need to redo your math for the handle placements. This tutorial shows you the formula on How to Make Crochet Bag Handles for any sized bag!

Lining Your Bag. To reduce the amount of stretch and to make it more durable, you’ll want to line your bag, using this tutorial.
For this bag, I would make my lining slightly larger than the bag, just to give the pretty stitches a chance to stretch out a bit.
What Is The Best Yarn for a Crochet Tote
I used my favorite go-to cotton yarn for bags: Bernat Handicrafter. It is a medium worsted weight yarn, and hold up quite nicely, especially when you take the time to line your bag.
Lily Sugar N Cream and other similar cottons can work just well.
More Free Patterns for Crochet Totes
- Blossom Crochet Beach Bag Pattern
- Bouncy Bubbly Crochet Tote
- Crochet Beach Tote
- Slanted Puffs Summer Bag
- Crunch Stitch Crochet Bag Pattern

Lacy Shells – Large Crochet Beach Bag Pattern
Skill Level
Materials
- Yarn: Bernat Handicrafter Cotton (Worsted Weight, #4; 100% Cotton; 400g/14oz; 614 meters/674yds) Color: Overcast, 1 ball
- Crochet Hook: H 5.00mm
- Other: Measuring Tape, Scissors, Yarn Needle.
Measurements
- Gauge: 14 sc sts = 4".
- Finished Size (Laid Flat): 20.5" wide by 18" high, not counting the handles.
- Base Measurement: 14.5" by 6.5"
Abbreviations
- RS = Right Side
- WS = Wrong Side
- Bead St = Bead Stitch
- Beg Shell St = Beginning Shell Stitch
- Shell St = Shell Stitch
- Ch/Chs = Chain/Chains
- Dc = Double Crochet
- Hk = Hook
- Lp/Lps = Loop/Loops
- Rep = Repeat
- Rnd/Rnds = Round/Rounds
- Sc = Single Crochet
- Sk = Skip
- Sl St = Slip Stitch
- Sp/Sps = Space/Spaces
- St/Sts = Stitch/Stitches
- YO = Yarn Over
- Crochet Abbreviations explained in more details.
Special Stitch Instructions
- Beg Shell St: Ch 3 (counts as first dc), (dc, ch 1, 2 dc) into the same st/ch as where the ch-3 was made.
- Shell St: (2 dc, ch 1, 2 dc) into designated st or ch.
- Bead St: Insert hk into indicated st/sp, yo and pull through, (yo and pull through one lp on hk) twice, yo and pull through both lps on hk. When you work into the next stitch make sure the bobble is facing the right side.
Notes
- Make your slip stitches nice and tight, especially when doing the base to help keep things even.
- This pattern is turned after pattern rounds 15 and 16.
Instructions
The Bottom (Base)
- Rnd 1 (RS): Loosely ch 28, sc in 2nd ch from hk and into next 25 chs, 3 sc in last ch. Working on opposite side of starting chs, sc in free lps of next 25 chs, 2 sc in last ch; join with sl st in first sc. [56 sts]
- Rnd 2: Ch 1, 3 sc in same st as join, *sc in next 25 sts, 3 sc in next st, sc in next st*, 3 sc in next st; rep from * to * once; join with sl st in first sc. [64 sts]
- Rnd 3: Ch 1, sc in same st as join, *3 sc in next st, sc in next 27 sts, 3 sc in next st*, sc in next 3 sts; rep from * to * once, then sc in last 2 sts; join with sl st in first sc. [72 sts]
- Rnd 4: Ch 1, sc in same st as join and into next st, *3 sc in next st, sc in next 29 sts, 3 sc in next st*, sc in next 5 sts; rep from * to * once, then sc in last 3 sts; join with sl st in first sc. [80 sts]
- Rnd 5: Ch 1, sc in same st as join and into next 2 sts, *3 sc in next st, sc in next 31 sts, 3 sc in next st*, sc in next 7 sts; rep from * to * once, then sc in last 4 sts; join with sl st in first sc. [88 sts]
- Rnd 6: Ch 1, sc in same st as join and into next 3 sts, *3 sc in next st, sc in next 33 sts, 3 sc in next st*, sc in next 9 sts; rep from * to * once, then sc in last 5 sts; join with sl st in first sc. [96 sts]
- Rnd 7: Ch 1, sc in same st as join and into next 4 sts, *3 sc in next st, sc in next 35 sts, 3 sc in next st*, sc in next 11 sts; rep from * to * once, then sc in last 6 sts; join with sl st in first sc. [104 sts]
- Rnd 8: Ch 1, sc in same st as join and into next 5 sts, *3 sc in next st, sc in next 37 sts, 3 sc in next st*, sc in next 13 sts; rep from * to * once, then sc in last 7 sts; join with sl st in first sc. [112 sts]
- Rnd 9: Ch 1, sc in same st as join and into next 6 sts, *3 sc in next st, sc in next 39 sts, 3 sc in next st*, sc in next 15 sts; rep from * to * once, then sc in last 8 sts; join with sl st in first sc. [120 sts]
- Rnd 10: Ch 1, sc in same st as join and into next 7 sts, *3 sc in next st, sc in next 41 sts, 3 sc in next st*, sc in next 17 sts; rep from * to * once, then sc in last 9 sts; join with sl st in first sc. [128 sts]
- Rnd 11: Ch 1, sc in same st as join and into next 8 sts, *3 sc in next st, sc in next 43 sts, 3 sc in next st*, sc in next 19 sts; rep from * to * once, then sc in last 10 sts; join with sl st in first sc. [136 sts]
- Rnd 12: Ch 1, sc in same st as join and into next 9 sts, *3 sc in next st, sc in next 45 sts, 3 sc in next st*, sc in next 21 sts; rep from * to * once, then sc in last 11 sts; join with sl st in first sc. [144 sts]
- Rnd 13: Ch 1, sc in same st as join and into each st around; join with sl st in first sc. [144 sts]
The Body of the Bag (Sides)
- Rnd 14: Work beg shell st in same st as join, *sk next 3 sts, shell in next st; rep from * around to last 3 sts; sk last 3 sts; join with sl st in first dc of beg shell st. [36 shells]
- Rnd 15 (RS): Sl st into next st and into ch-1 sp of first shell, ch 1, (sc, bead st, sc) into same ch-1 sp, ch 2, *(sc, bead st, sc) into next ch-1 sp, ch 2; rep from * around; join with sl st in first sc. Turn. [36 ch-2 sps]
- Rnd 16 (WS): Ch 1, 2 sc in first ch-2 sp, ch 3, *2 sc in next ch-2 sp, ch 3; rep from * around; join with sl st in first sc. Turn. [36 ch-3 sps]
- Rnd 17 (RS): Sl st into first ch and into center ch of ch-3 lp, work beg shell st in same ch, *shell st in center ch of next ch-3 sp; rep from * around; join with sl st in first dc of first shell. [36 shells]
- Rnds 9-41: Rep Rnds 15 to 17.
- Rnds 42-43: Rep Rnds 15-16.
- Rnd 44 (RS): Ch 1, 2 sc into first ch-3 sp, sc into next 2 sc, *2 sc into next ch-3 sp, sc into next 2 sc; rep from * around; join with sl st in first sc. [144 sts]
Handles
- Lay the bag flat to place your markers for the handles. Count over 24 sts on the sides of the bag and place stitch marker in 25th stitch. Counting the stitch markers, you should have 24 sts marked off in the middle. Do the same on the other side. Stitch markers should align on each side of the bag. Do not crochet into the 24 stitches in the middle. Here is a tutorial.

- Rnd 45: Ch 1, sc in same st as join and into each st up to marked st, *loosely ch 60 (or any number depending on how long or short you want the handles), sk the 24 sts marked off in the middle*, sc in next 48 sts; rep from * to * once; then sc in remaining sts; join with sl st in first sc. [96 sts and 120 chs]
- Note: To keep things even, I like to crochet into the back bumps of the chains made for the handles.
- Rnd 46: Ch 1, sc in same st as join and into each st and ch around; join with sl st in first sc. [216 sts]
- Rnds 47-51: Ch 1, sc in same st as join and into each st around; join with sl st in first sc. [216 sts] Fasten Off.