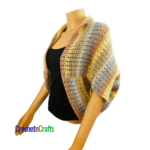
Eyelet Rows Crochet Sleeveless Top
This sleeveless crochet top pattern is perfect for the summer season or any time of the year. It can be worn in different styles and outfits, making it easy for you to get lots of use out of this one.

It is the perfect crochet top to go with a skirt or your favorite pair of denim jeans! So whatever the occasion, this top pattern is perfect!
How it’s Made
This easy crochet pattern is worked in two rectangles, which are joined together at the shoulders and sides. The simple construction makes it super easy to customize the sizes for the neck and arm openings.
The stitch pattern is perfect for beginners who are comfortable with seaming and constructing a top.
The only stitches used are the double crochet and the half double crochet with chain stitches. Then single crochet stitches for the edging.
For the seam, I like to use the mattress stitch, which keeps things nice and flat for you.
As for the shoulder seam, you have the option to sew all the way across, or leave a bit of an opening. The opening is perfect if you plan on wearing this top with a skirt or another dressy outfit.

Finished Sizes
The free pattern includes women’s sizes from XS to XL. However, it can easily be customized to fit any size in the multiple provided.
The pattern has an ease of 6 inches, but you can modify that as well if you like.
The Yarn
I used Scheepjes Stone Washed yarn with a 3.5 mm crochet hook. The label does not specify the yarn weight, but it is a fine #2. It is a soft cotton/acrylic blend, and is very nice to work with.

You Might Also Enjoy These Crochet Patterns
- FREE Crochet Summer Tops
- Simple Summer Poncho Crochet Pattern
- Crochet Granny Stitch Square Poncho
- Bonanza Brick Shrug
- Criss Cross Crochet Cocoon Shrug

Eyelet Rows Crochet Sleeveless Top
Skill Level
Materials
- Yarn: Scheepjes Stone Washed (Fine, #2; 78% Cotton, 22% Acrylic; 50g; 130m) Color: Beryl, 6, (7, 8, 9, 9) balls
- Crochet Hook: E 3.50mm
- Other: Measuring Tape, Scissors, Stitch Markers, Yarn Needle
Measurements
- Gauge: 13 sts = 3"; 8 rows = 3.5"
- Finished Sizes: XS, (S, M, L, XL)
- To Fit Bust Sizes: 28", (32", 36" 40" 44")
- Finished Width Measurements: 17, (19, 20.5, 23, 25)
- Finished Length Measurements: 23, (23, 23, 23.8, 23.8)
Abbreviations
- Ch/Chs = Chain/Chains
- Dc = Double Crochet
- FO = Fasten Off
- Hdc = Half Double Crochet
- Hk = Hook
- Sk = Skip
- Sp/Sps = Space/Spaces
- St/Sts = Stitch/Stitches
- Crochet Abbreviations explained in more details.
Notes
- The small size is shown on a 33" bust.
- Pattern is given for XS. Changes for sizes S, M, L, XL are given in parenthesis.
- This garment is designed with 6" of ease.
- Garment is worked in two pieces from bottom up; front and back. Each piece is worked identical.
- Increase/Decrease the width as desired in any multiple of 2 + 1 for the starting chains. As for length, do more or less repeats of Rows 2 and 3.
- Adjust shoulder and side seams for a custom fit.
- Block both pieces to dimensions before seaming.
- Sew seams with the locking mattress stitch.
- Gauge and measurements are given after blocking.
Instructions
- Make 2.
- Leaving a 40" tail for sewing side seams, loosely ch 75, (83, 91, 101, 109), or any multiple of 2 + 1.
- Row 1: Working into back bumps, dc in 3rd ch from hk and into each ch across. (Skipped chs do not count as first st.) Turn. [73, (81, 89, 99, 107) sts]
- Row 2: Ch 1 (does not count as st), (hdc, ch 1) in first st, *sk next st, (hdc, ch 1) in next st; repeat from * across to the last 2 sts, sk next st, hdc in last st. Turn. [36, (40, 44, 49, 53) ch-1 sps]
- Row 3: Ch 2 (does not count as st), dc in first st and into each st and ch across. Turn. [73, (81, 89, 99, 107) sts]
- Rows 4-55, (55, 55, 57, 57): Repeat rows 2 and 3 alternatively. FO at last row leaving 20" tail for sewing shoulder seams.
Blocking
- Block both pieces to measurements in schematic. To block, simply wet the pieces and lay them flat to dry.
Shoulder Seams
- Sew seams 3.5, (4, 4.5, 5.25, 6)" on each side.
- Another option is to sew about .75, (1, 1, 1.25, 1.5)" starting along the outer edge. Then leave about 2, (2, 2.5, 2.75, 3" open before sewing the remaining .75, (1, 1, 1.25, 1.5)" of the shoulder seam.
Side Seams
- Starting at the bottom with the tail end, sew seams along the sides leaving an 8, (8.5, 9 , 9.5, 10)" opening for the armhole.
- If you have wide hips, and need more room around the hip area, you can leave a slit open, thus starting your seam a few inches up from the bottom.
Edging for Armhole Openings
- With a standing single crochet, join yarn to the bottom of the armhole seam and single crochet evenly around; join with a slip stitch in the first single crochet. FO.
- You can also add the edging around the neck opening and the bottom if you like.


Beginner in corochet but so interested
This is beautiful ,l love crocheting will definitely try these patterns