
Pretty Simple Slouch Hat Crochet Pattern


This slouch hat crochet pattern features a very simple, yet pretty stitch pattern that you’ll enjoy wearing in the cooler weather.
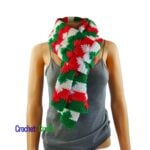
It is shown here in a solid color, but you could do rainbows, other color patterns, or whatever striped design you like. You could even use up any of your scrap yarns.

The crochet slouch hat works up quick and easy, and is pretty mindless once you get going on it. And that makes it the perfect go-to pattern for making gifts or for selling at craft fairs.
The Stitch Pattern
This crochet hat is worked up from the bottom to the top. First, the ribbing is worked in rows until it reaches comfortable around the head. Then you join the ribbing and begin working in rounds.
The body of the hat is a multiple of two. It is worked simply with half double crochet stitches. The first round is with 2 half doubles in one stitch, then skip a stitch. For the next round, the two half doubles are worked in between the previous set as shown below.

The Finished Size
The easy slouch hat crochet pattern provides instructions for a teen/adult small sized hat. But in a simple multiple of two, you can easily adjust this to any size from baby to adult. Here is a hat sizing chart to help take the guesswork out.
The Yarn
I used Vanna’s Choice, which is a medium worsted weight yarn. It is soft and results in a nice stretchy fabric, which is always a bonus for a hat.
And if you like this , you might also enjoy more designs in the ‘pretty simple‘ series.
Other Patterns to Try
- Easy Crochet Beanie with Single Crochets
- Criss Cross Slouchy Beanie
- Winter Drifts Crochet Slouchy Beanie in Worsted Weight
- Beaded Stripes Easy Crochet Slouchy Hat
- Charisma Crochet Slouchy Beanie
Purchase Your Ad-Free PDF

Pretty Simple Slouch Hat Crochet Pattern
Skill Level
Materials
- Yarn: Vanna's Choice (Worsted Weight, #4; 100% acrylic; 3.5oz/100g; 170 yds/156 m) 1 ball
- Crochet Hook: I/9-5.50mm
- Other: Measuring Tape, Scissors, Yarn Needle.
Measurements
- Gauge: 1.5" over 4 hdc.
- Finished Size: Laying flat it measures 9.5 across by 9.5 from top to bottom. Fits Teen/Adult Small, but can be increased/decreased to any size.
Abbreviations
- Blsc = Back Loop Single Crochet
- Ch/Chs = Chain/Chains
- Hdc = Half Double Crochet
- Hk = Hook
- Rep = Repeat
- Sc = Single Crochet
- Sk = Skip
- Sl St = Slip Stitch
- Sp/Sps = Space/Spaces
- Crochet Abbreviations explained in more details.
Special Stitch Instructions
- When you work 2 hdc's into the same stitch or space, think of these as a set. Then when you crochet your next round and the pattern says "2 hdc in sp before next hdc", work the 2 hdc's in the middle of (or in between) the hdc set.
- Pretty Simple Stitch Tutorial
Instructions
Ribbing Rows
- Row 1: Ch 8, sc in 2nd ch from hook and into next 6 chs. Turn. [7 sc]
- Rows 2-54: Ch 1, blsc in each sc across. Turn. [7 sts] Continue with this row until you have reached a desired circumference making sure to end in an even number of rows.
- Ch 1 and join the ribbing rows by slip stitching the last row to the free loops of starting chains.
Working in the Round (Body of Hat)
- Rnd 1: This round is worked along the ribbing edge and into every other ribbing row. (I worked into the ribs pointing away from me). Ch 1 and work 2 hdc in first ribbing row that's pointing away from you. *Sk next ribbing row, 2 hdc in next row; rep from * around; join with sl st in first hdc. [54 sts]
- Rnd 2: Sl st in sp before next hdc, ch 1, work 2 hdc in same sp, *sk next 2 hdc, 2 hdc in sp before next hdc; rep from * around; join with sl st in first hdc. [54 sts]
- Rnds 3-20: Rep rnd 2.
- Rnd 21: Sl st in sp before next hdc, ch 1, work 1 hdc in same sp, *sk next 2 hdc, 1 hdc in sp before next hdc; rep from * around; join with sl st in first hdc. [27 sts]
- Fasten Off leaving an 8"-10" tail to weave in through last rnd. Pull tight to close and secure. Leave as is, or add an optional pom pom.
Also be sure to check out more FREE Hat Crochet Patterns here on CNC, or Visit CPB for over 280 FREE Women’s Hats Crochet Patterns.


Thanks and I was even relate!
mine came out very nice. except i had to before the slip stitch at the end of the rows add two more hdc’s to make 50. Also added more decrease rows at the end to form it to close the hole