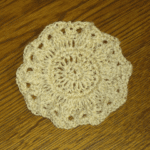
Blossom Stitch Crochet Lace Placemat Pattern
This crochet lace placemat pattern is worked up in the blossom stitch to give you a nice simple lace throughout. It’s an open stitch, but still solid enough to give your table the protection it needs against plates and other dinnerware. If you need more protection, you can crochet up a solid layer to go behind this, or you can use fabric to sew a liner for the back.
The crochet placemat pattern is great for any kind of table, whether round, square or oval. And it’s great for everyday use or special occasions!
I like the potpourri ombre yarn that I used here. It matches my table perfectly, but any solid color or other ombres would look nice too.
This free crochet pattern is also available in a paid pdf. Shop Etsy & Save 25% with coupon code: CNC25
What is the Best Yarn for a Crocheted Placemat
A worsted weight cotton yarn is the best choice for crocheted placemats for several reasons.
- The yarn is made of cotton, so you know it is more heat-resistant than many other yarns on the market.
- The yarn is also absorbent, making it great for spills as well.
- Cotton yarn is strong and durable.

Subscribe for Free Crochet Patterns, Coupons, and Other Crafty Promotions.
You will also receive a PDF copy of these Crochet Dishcloth patterns.
Your email will not be shared. Unsubscribe any time. By subscribing you agree to our privacy policy and terms of use.
Blossom Stitch Crochet Lace Placemat – Pattern Information
This crochet lace placemat pattern is worked up in the blossom stitch to give you a nice open lace for your kitchen table.
Skill Level: Easy
Materials
- Yarn: Lily Sugar ‘n Cream – Cone (Worsted Weight, #4; 100% Cotton; 400g/14oz; 616 meters/674yds) Color: Potpourri Ombre, 1 cone
- Crochet Hook: H 5.00mm
- Other: Measuring Tape, Scissors, Yarn Needle.
I always recommend a cotton yarn for a placemat because it is heat-resistant. For this pattern, I used Lily Sugar ‘N’ Cream. The worsted-weight cotton material works well with a 5 mm crochet hook. Another similar yarn that would work well with this is Bernat Handicrafter Cotton.
Measurements
- Finished Size: 18″ by 13″
- Gauge: 14 sts/chs = 4″
The size is super easy to adjust to anything bigger or smaller as you need in a multiple of four for the starting chains.
Abbreviations
- Ch/Chs = Chain/Chains
- Dc = Double Crochet
- FO = Fasten Off
- Hk = Hook
- Rep = Repeat
- RS = Right Side
- Sc = Single Crochet
- Sk = Skip
- Sl St = Slip Stitch
- Sp/Sps = Space/Spaces
- St/Sts = Stitch/Stitches
- V-St = V Stitch
- Crochet Abbreviations explained in more details.
Special Stitch Instructions
- V-St: (dc, ch 1, dc) in the designated chain or space.
- Blossom Stitch Tutorial
The blossom stitch pattern is worked with basic crochet stitches such as the chains, single crochet and double crochet stitches.
The rows are alternated between the double crochet v-stitch and the single crochet in one row, followed by the double crochet and chain one and the single crochet and chain one in the next row.
It is very simple and mindless, but the final result is nice enough for any occasion.
This video shows how to make the blossom stitch in rows as well as in rounds.
Crochet Lace Placemat Pattern Instructions
Ch 62 or any multiple of 4 + 2.
Row 1 (RS): Sc in 2nd ch from hook, *sk next ch, v-st in next ch, sk next ch, sc in next ch; rep from * across. Turn. [15 V-sts]
Row 2: Ch 4 (counts as first dc and ch-1 sp), (sc, ch 1) in first v-st, *(dc, ch 1) in next sc, (sc, ch 1) in next v-st; rep from * across to last sc, dc in last sc. Turn. [30 ch-1 sps]
Row 3: Ch 1, sc in first dc, *v-st in next sc, sc in next dc; rep from * across. Turn. [15 V-sts]
Rows 4-29: Rep rows 2-3.
Edging
Rnds 1-2: Sc evenly around working 3 sc into each corner. Join with sl st in first sc. Fasten Off at the last round.


