
Eyelet Rows Cotton Dishcloth Pattern

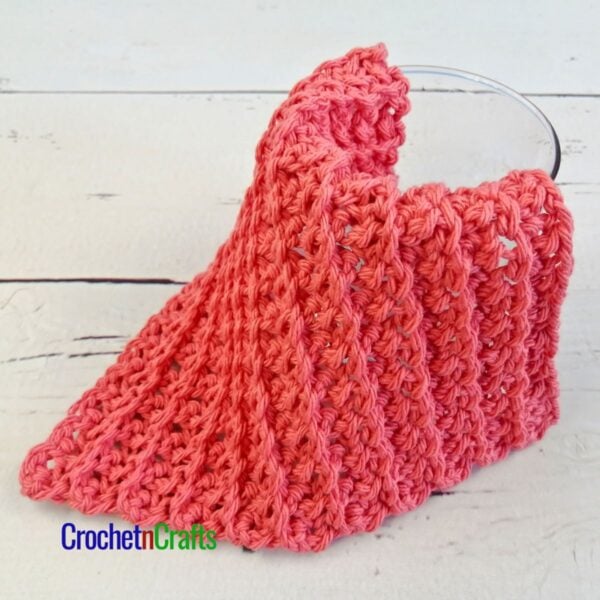
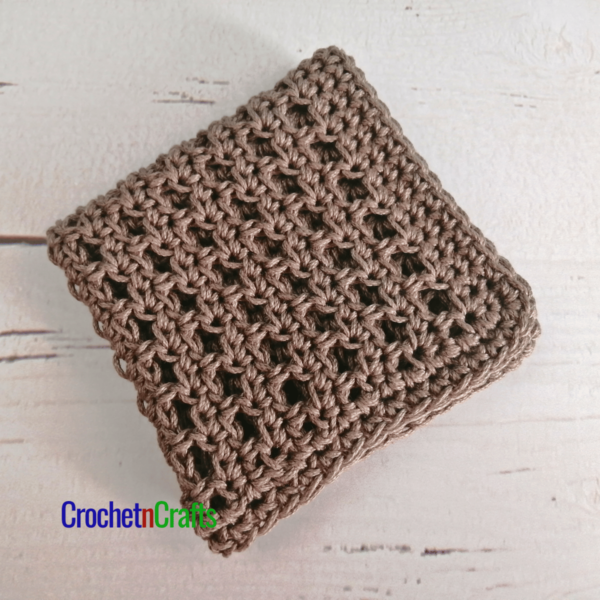
This is an easy cotton dishcloth pattern. It’s a nice open stitch with a nice drape, which makes it ideal for dishes. Plus, the open stitch also helps for it to dry quicker, which is a bonus when it comes to dishcloths.
I worked mine in a solid color, but feel free to use up the small amounts of scraps for added color. Either way, this dishcloth will be perfect for your kitchen or in a gift basket.


This free crochet pattern is also available in a paid pdf. Shop Etsy & Save 25% with coupon code: CNC25


Subscribe for Free Crochet Patterns, Coupons, and Other Crafty Promotions.
You will also receive a PDF copy of nine Crochet Dishcloth patterns.
Your email will not be shared. Unsubscribe any time. By subscribing, you agree to our privacy policy and terms of use.
Eyelet Rows Cotton Dishcloth Pattern
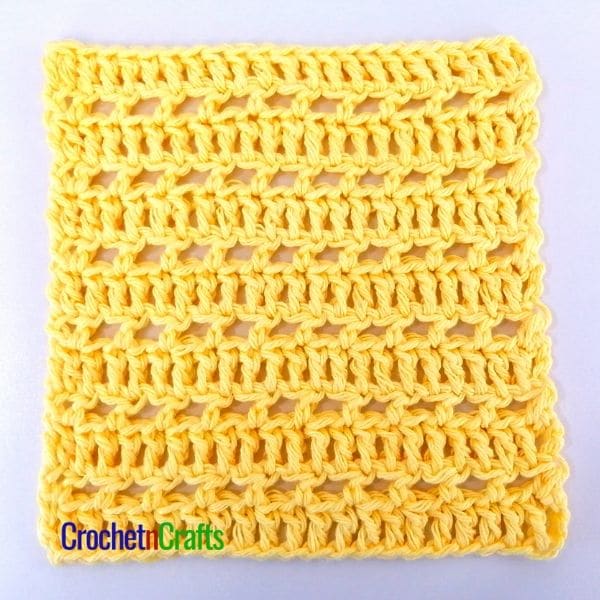
This dishcloth has a nice open stitch, making it great for the summer when you need things to dry quickly.
Skill Level: Easy
Materials
- Yarn: Bernat Handicrafter Cotton (Worsted Weight, #4; 100% Cotton; 1.75 oz/50g; 80yds/73m) 1 ball
- Crochet Hook: I 5.50mm
- Other: Scissors, Yarn Needle.
My go-to yarn for dishcloths is Bernat Handicrafter Cotton, which is very similar to Lily Sugar ‘n Cream. Both are a worsted weight #4 yarn made with 100% cotton material. The yarn is durable and perfect for scrubbing.
Finished Size
- 7.25″ by 7.25″.
Abbreviations
- Ch/Chs = Chain/Chains
- Dc = Double Crochet
- Dc2tog = Double Crochet 2 Together
- Hdc = Half Double Crochet
- Hdc2tog = Half Double Crochet 2 Together
- Hk = Hook
- Lp/Lps = Loop/Loops
- Sk = Skip
- Sp/Sps = Space/Spaces
- St/Sts = Stitch/Stitches
- YO = Yarn Over
Special Stitch Instructions
- Dc2tog: Yo and insert hk into the first st, yo and pull up a lp, yo and pull through 2 lps on hk (2 lps left). Yo and insert hk into the next st, yo and pull up a lp, yo and pull through 2 lps (3 lps left on hk). Yo and pull through all 3 lps on hk.
- Hdc2tog: Yo and insert hk into the first st, yo and pull up a lp; yo and insert hk into the next st, yo and pull up a lp (5 lps on hk); yo and pull through all 5 lps on hk.
Notes
- The chains made at the beginning of each row count as your first stitch made. Another stitch is worked into the first stitch for a total of 2 stitches made in the first stitch.
- Then at the end of the row, a decrease is made over the last 2 stitches to maintain the stitch count. This helps to keep the edges straighter.
Cotton Dishcloth Crochet Pattern Instructions
Loosely ch 24, or any multiple of 2.
Row 1: Working into back bumps, dc in 4th ch from hk and into each ch across. (Skipped chs count as first st.) Turn. [22 sts]
Row 2: Ch 2 (counts as first hdc), (hdc, ch 1) in first st, *sk next st, (hdc, ch 1) in next st; repeat from * across to the last 3 sts, sk next st, hdc2tog over the last 2 sts. Turn. [10 ch-1 sps]
Row 3: Ch 3 (counts as first dc), dc in first st and in each st and ch across to last 2 sts; dc2tog over last 2 sts. Turn. [22 sts]
Rows 4-13: Repeat rows 2 and 3. Fasten Off at last row.
Video Tutorial
The stitch pattern is very simple with double crochets in one row, followed by half doubles and chain one spaces in the next row.
I worked this without an edging, but it is up to you whether or not you want to add one.
I found a way to obtain a straighter edge. My secret is to increase at the beginning of the row and then to decrease at the end of the row. I found that not only does this give you a straighter edge, but it also helps to reduce the gap that you sometimes get at the start of the row. I love this technique, but let me know your thoughts in the comments below.
You Might Also Like These:
Dishcloth Crochet Patterns
See More Crochet Dishcloth Patterns.


Hi Rhelena:
I just found your website and watched your tutorial for the Eyelet Rows Cotton Dishcloth Pattern. It’s a lovely dishcloth/washcloth and I particularly became interested when you said you had a way of straightening the edges but increasing and decreasing at the beginnings and ends of rows. I really like your method and would love to see you incorporate it in other patterns you design. Does it work with any foundation chain count, even or odd? Certain stitch patterns? If you can give a brief rule of thumb as to when it can be used, that would be so helpful. I always love ways to keep my edges straight and to avoid that chain 3 turning chain gap, if possible! Also, do you happen to have a YouTube channel? I looked but couldn’t find it…. I wanted to subscribe. Thanks for sharing this pattern and your ingenious way to keep the edges straight. I’ll be checking back with your blog regularly from now on. 😊 Charlotte from Phoenix ☀️🌵🌴🐍
Hi Charlotte, Thank you so much for the feedback. It should work with any stitch count as long as you are able to add that one extra stitch at the beginning and then decrease at the end of each row. As for different stitch patterns, I really can’t say on whether or not it would work.
My YouTube channel is here: https://www.youtube.com/channel/UCsAo-uRMq1T1Fg0v70STKWg/
Thanks again :)
Hi there – I for one really like that the edges are straighter due to the increases and decreases on the ends. I don’t have to do a 2nd boarder. Thanks for showing that and I will be using it from now on.