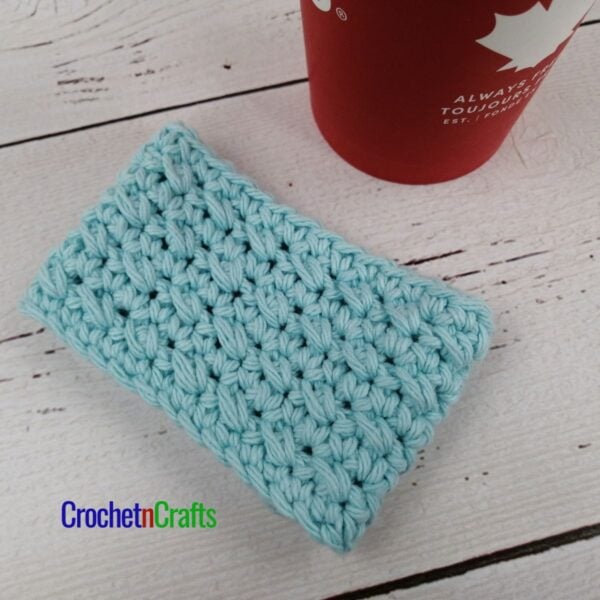
Criss-Cross Crochet Mug Cozy
The texture and fabric look great on both sides of this crochet mug cozy, so you can choose which side you like best. It comes with a cute button and strap that goes over the mug handle for a secure fit.
Another bonus of this mug cozy is that it’s worked from the very bottom up, so you also have a nice coaster to protect your tabletops from scratches and drips.
Finished Size
The crochet mug cozy pattern is designed to fit a mug that is 3.25″ in diameter. But, the diameter can be adjusted for other-sized mugs if needed.
Recommended Yarn
Bernat Handicrafter Cotton yarn is a good choice for crocheted mug cozies. It is a natural material, absorbent, and also heat resistant! Plus, it is available in most yarn stores. With that said, there are other yarns on the market that can be used instead. Lily Sugar N Cream is one good alternative.
I worked mine in a solid color, but I could see how a pretty striped pattern would look great on this design.
Bernat Handicrafter Cotton
The Stitch Pattern
This crochet mug cozy is started at the bottom with half double crochet stitches.
Then for the body, the half doubles are worked in a cross stitch pattern for a pretty texture. The body is worked in rows to leave an opening for the mug handle.
Lastly, a loop and a button are attached to the top to hold the cozy in place.

Criss Cross Crochet Mug Cozy
Skill Level
Materials
- Yarn: Bernat Handicrafter Cotton #4 Worsted weight yarn.
- Crochet Hooks: H/8-5.00mm & G/6-4.25mm
- Tools: Scissors, Yarn Needle.
Measurements
- Fits a mug that is 3.25" in diameter.
Abbreviations
- Ch/Chs = Chain/Chains
- Flo = Front Loops Only
- FO = Fasten Off
- Hdc = Half Double Crochet
- Hk = Hook
- Rep = Repeat
- Sc = Single Crochet
- Sk = Skip
- Sl St = Slip Stitch
- St/Sts = Stitch/Stitches
- See the Crochet Abbreviations Chart for more details.
Note
- This pattern is written in American Crochet Terms
Helpful Links
Instructions
- Rnd 1: Ch 2, work 8 hdc into 2nd ch from hk; join with sl st in first hdc (8 sts)
- Rnd 2: Ch 1, work 2 hdc in same st as join and into each st around; join with sl st in first hdc. (16 sts)
- Rnd 3: Ch 1, hdc in same st as join, 2 hdc in next st, *hdc in next st, 2 hdc in next st; rep from * around; join with sl st in first hdc. (24 sts)
- Rnd 4: Ch 1, hdc in same st as join and into next st, 2 hdc in next st, *hdc in next 2 sts, 2 hdc in next st; rep from * around; join with sl st in first hdc. (32 sts) TURN.
- Rnd 5: Working in flo, ch 1, sc in each st around; join with sl st in first sc. (32 sts) Turn.
- Rnd 6: Ch 1, sk first st, hdc in next st, hdc in skipped st; *sk next st, hdc in next st, hdc in skipped st; rep from * around; join with sl st in first hdc. Turn.
Begin working in rows:
- Row 1: Working in flo, ch 1, sc in first 30 sts. Turn, leaving remaining 2 stitches unworked.
- Row 2: Ch 1, hdc in first st, *sk next st, hdc in next st, hdc in skipped st; rep from * across to last st; hdc in last st. (30 sts) Turn.
- Row 3: Working in flo, ch 1, sc in each st across. (30 sts) Turn.
- Rows 4-6: Rep rows 2-3 ending with row 2 at row 6. Do Not FO, Turn & continue with edging.
Edging & Loop:
- Working in flo, ch 1, sc in each st across. Ch 15. Turn your work sideways and work another sc into the corner where last sc was made. Then sc evenly around edge making sure fabric lies flat. Work another 2 sc into same st as where first sc was made; join with sl st in first sc. FO.
Button:
- Rnd 1: With G/6-4.25mm hk, Ch 2, work 8 sc into 2nd ch from hk, join with sl st in first sc. (8 sts)
- Rnd 2: Ch 1, sc in same st as join and into each st around. (8 sts)
- Rnd 3: Ch 1, Encase rnd 2 by working 1 sc into each st of rnd 1. FO leaving a long tail for sewing.
- Weave the tail end through the sts of rnd 3. Pull the tail tight and sew button onto top corner of mug on opposite corner from the loop.
Cup Cozies
See More Crochet Cup Cozy Patterns.


Can you drawing symbol Pattern for this crochet?
It’s on my list for the future :)
pretty. and it looks complicated…but I’ll try it. thank you
It’s actually easy, but let me know if you have any problems. Thanks so much. :)
Having trouble on row 6 actually. Please help. Thank u
Round 6 is worked in a cross stitch. I have a tutorial for the cross stitch here: https://crochetncrafts.com/how-to-make-the-cross-stitch-in-crochet/